
When we started house hunting I knew I didn’t want a Raised Ranch or some of you call it a split entry. But that is what we got and I had to make the most of it.
At the top of the stairs was a typical raised ranch iron railing. I hated it. I felt cold, uninviting, also felt unsafe with a new baby and not to mention that people walking up the stairs had a great view of any dust or or dirt that might be on the floor.
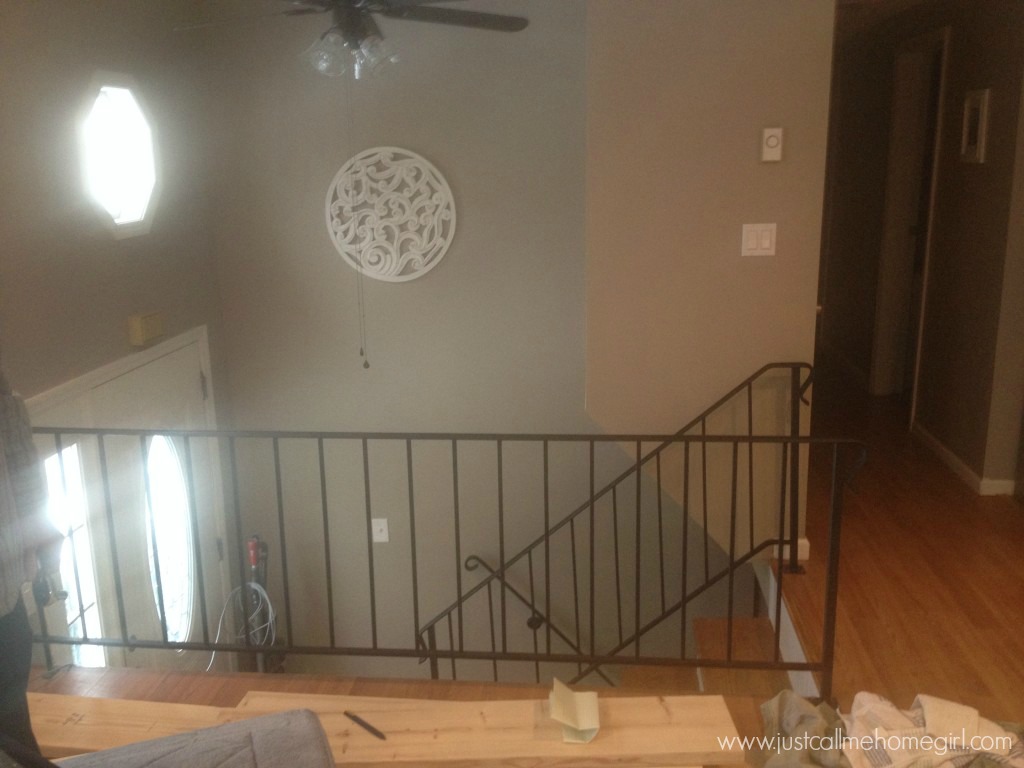
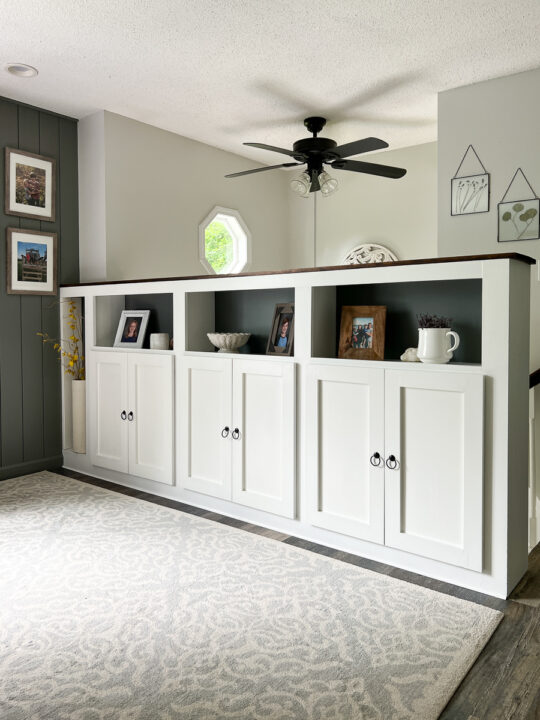
We grew up in a raised ranch and where that railing was, was a half wall. I knew that’s what I wanted but I wanted to make it unexpected. I decided I wanted to create built in shelves there.
I had no plans or how-to’s that I could find, so along with my parents we figured it out.
How To Make a Half Wall Built In Shelving
First, measure how deep/tall you would like the bookcase and adjust these plans accordingly.
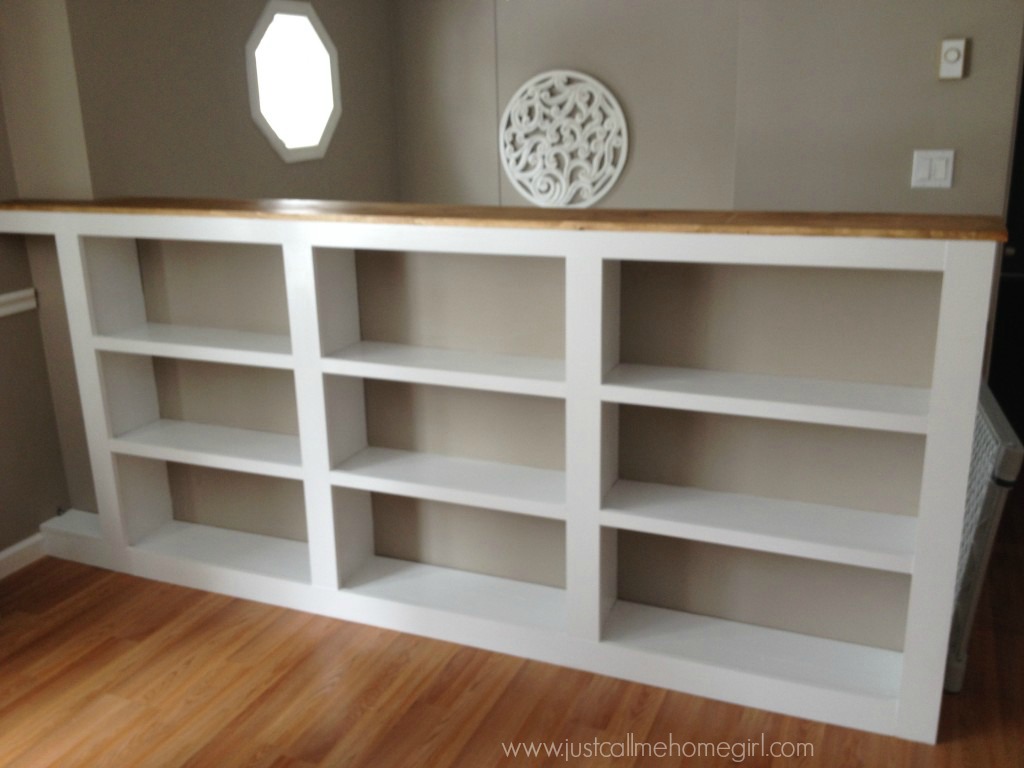
After we removed the railing the main concern was how we were going to make sure it was sturdy.
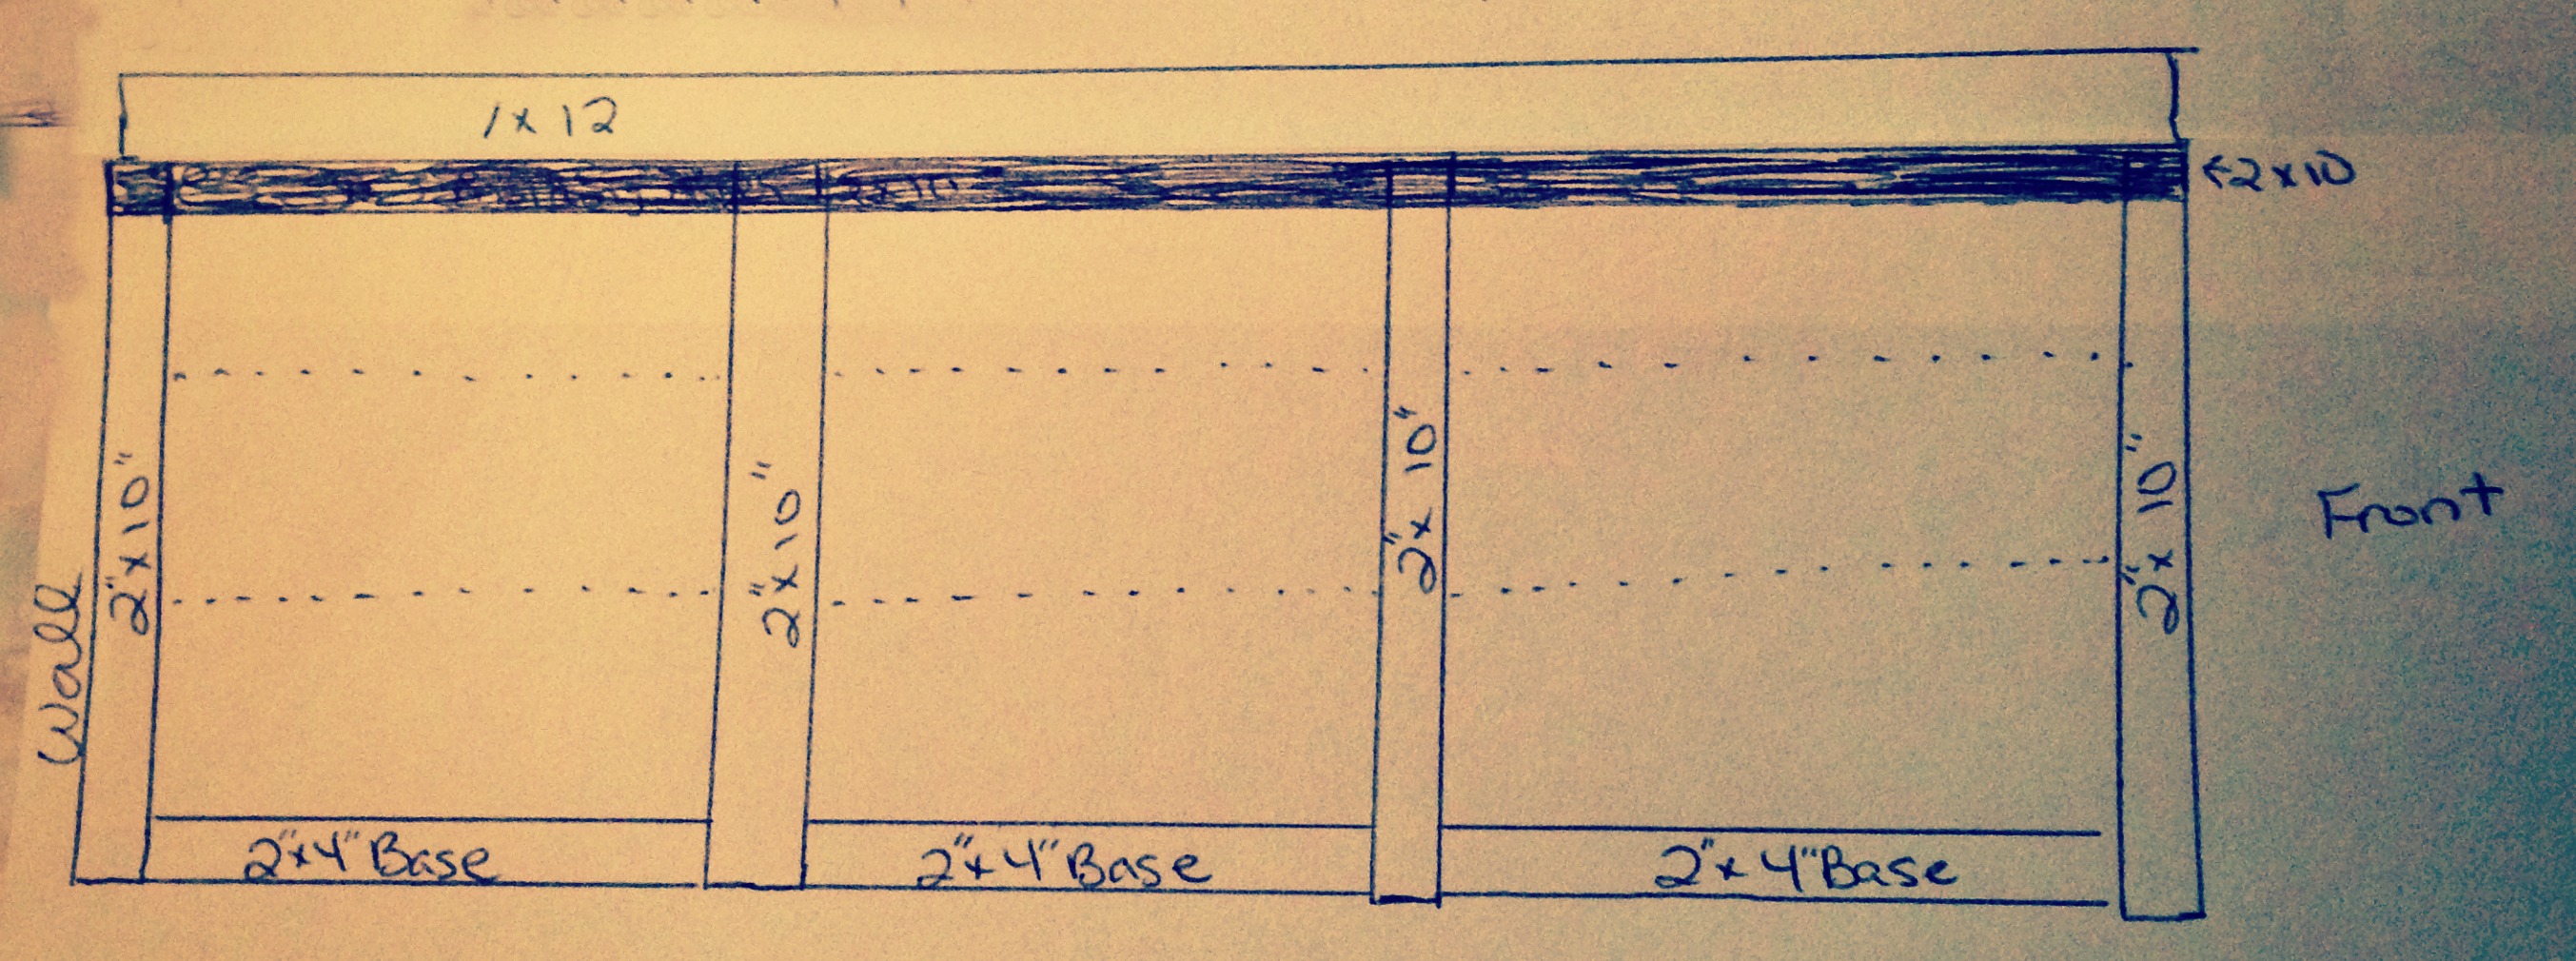
We made 3 boxes out of 2×4’s (4″ side on the floor) and secured them to the floor joists with room in-between and on the ends to fit a 2×10.
Cut 4 – 2×10’s the height of the bookshelf and fit on the end and in-between the 2×4 boxes and secure.
Here is a birds eye view of the plan.

Cut 1 2×10 board to place on top and secure to the 2×10 vertical boards.
To finish off the top we used a 1×12 the cut to the length of the shelf and also a 1×12 cut to height to finish off the end.
Add the shelves- 1×10’s cut to length and used shelf pins to set the shelves on for the desired height.
For the molding to add the finished look it was:
1×4 – across the bottom and 4 vertical “posts”
1×3 – across the top (2×10 board)
1×2 covering shelves across
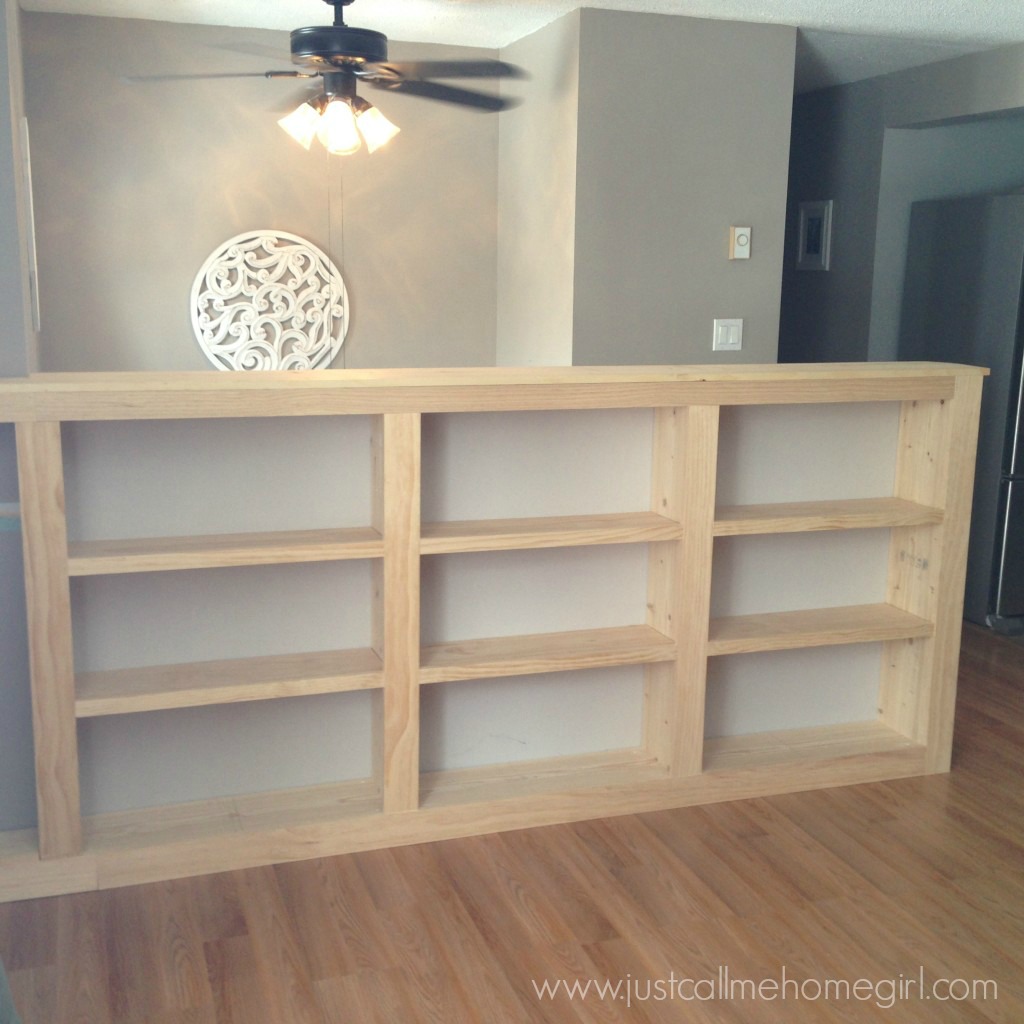
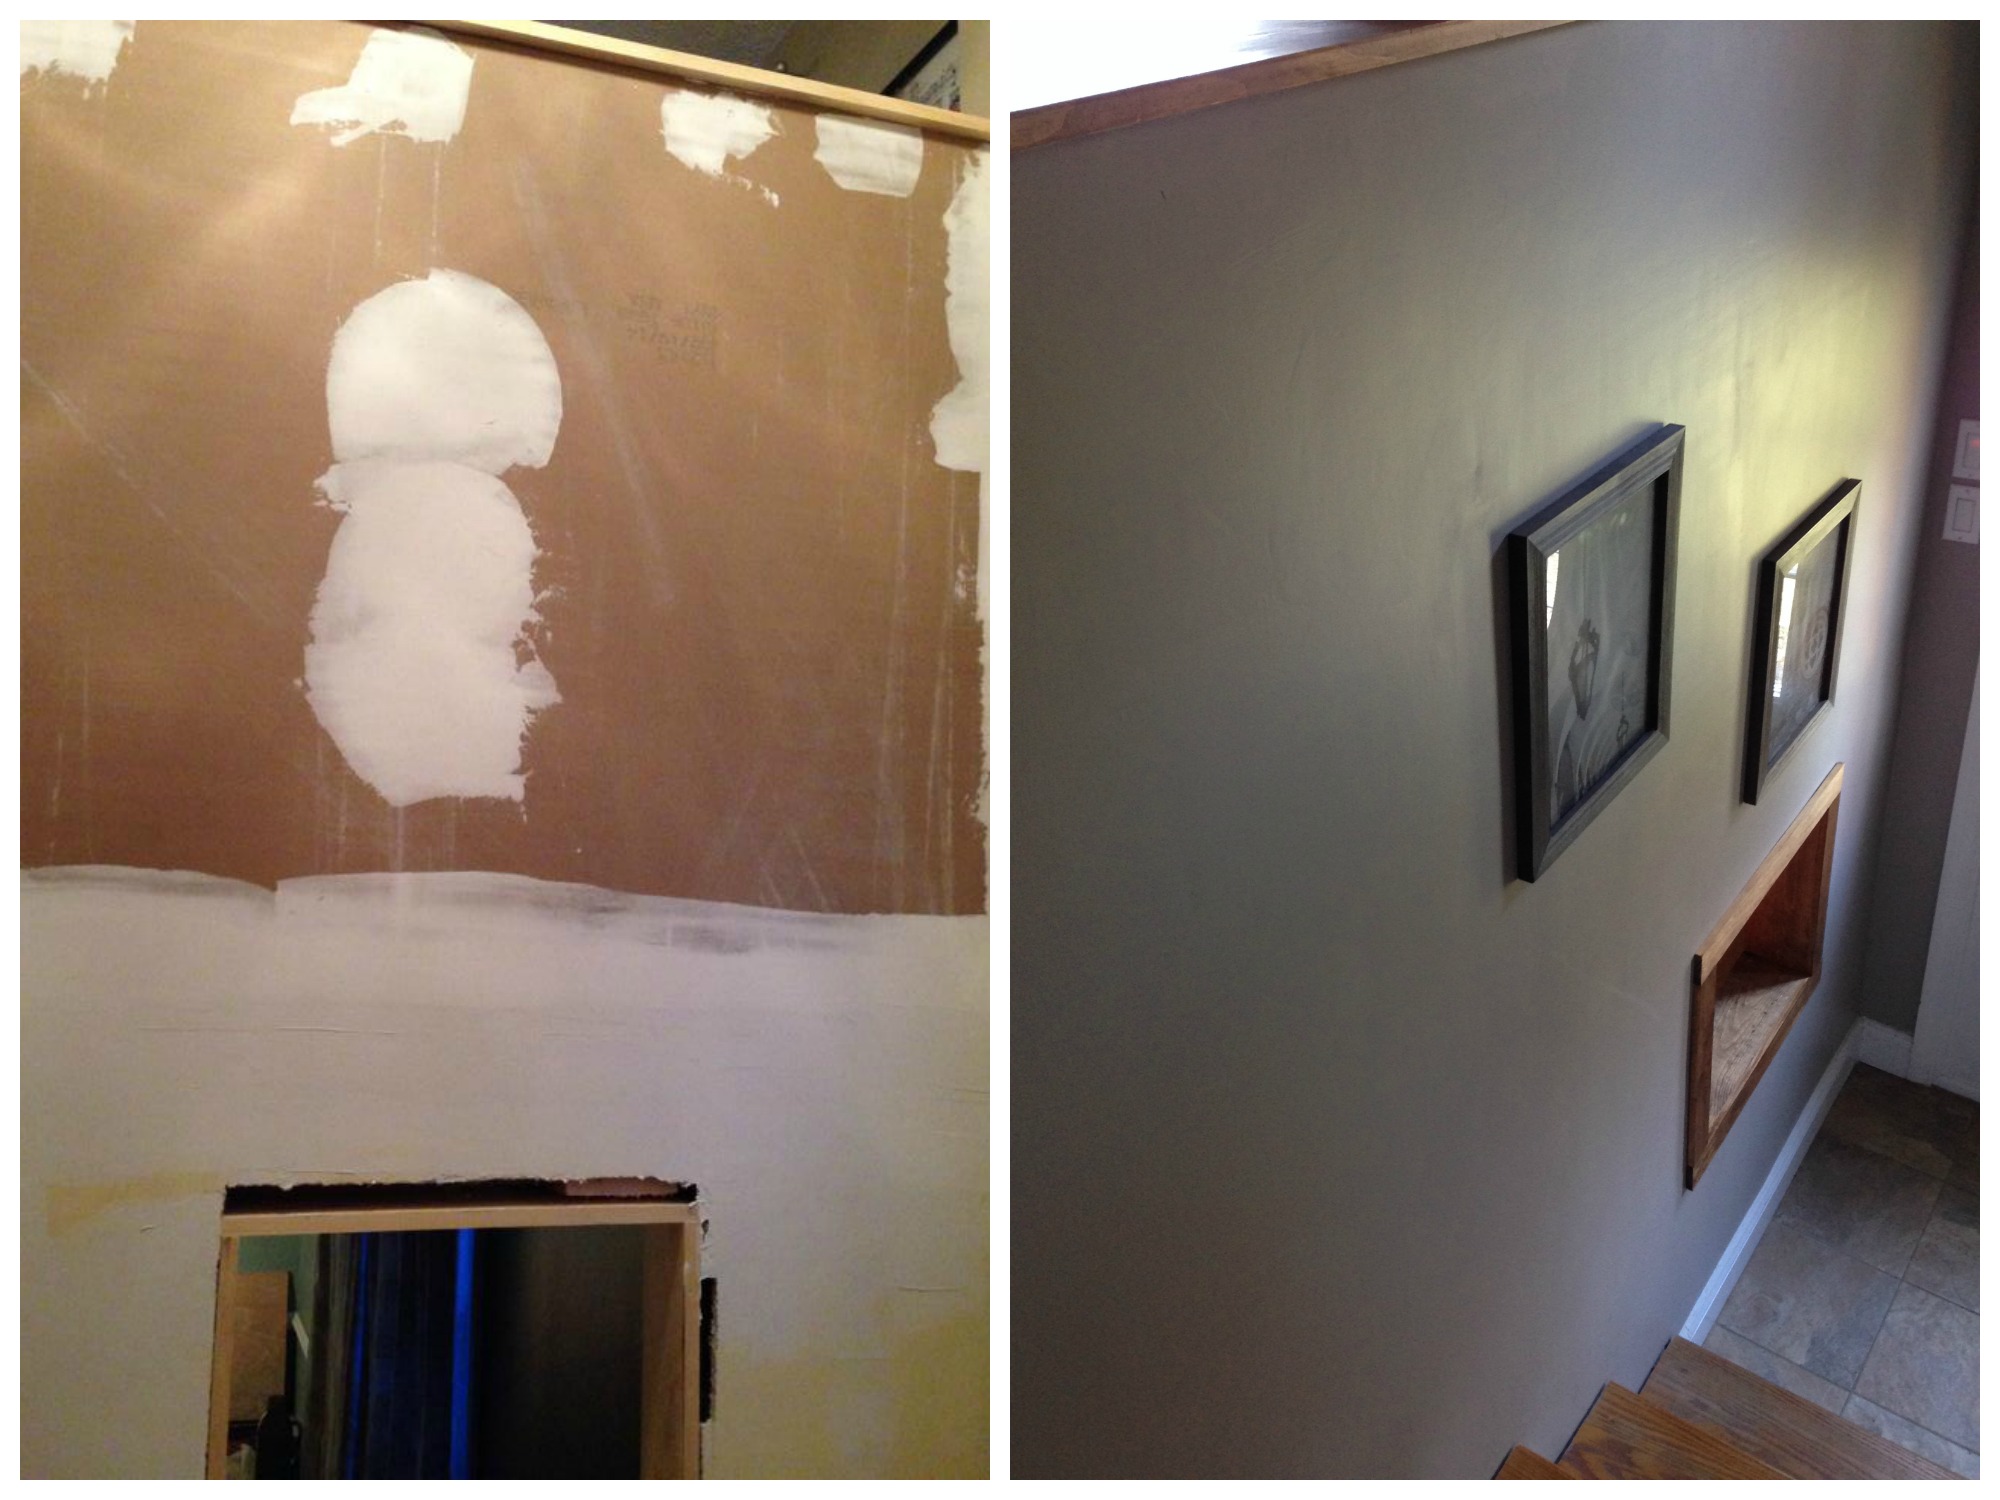
For the back, there was wainscoting coming up the stairs which I hated. Took it off and added sheetrock to the back of the bookcase, taped, primed and painted!
After creating this post we have also made over our entry.
You can see the entry way update here.
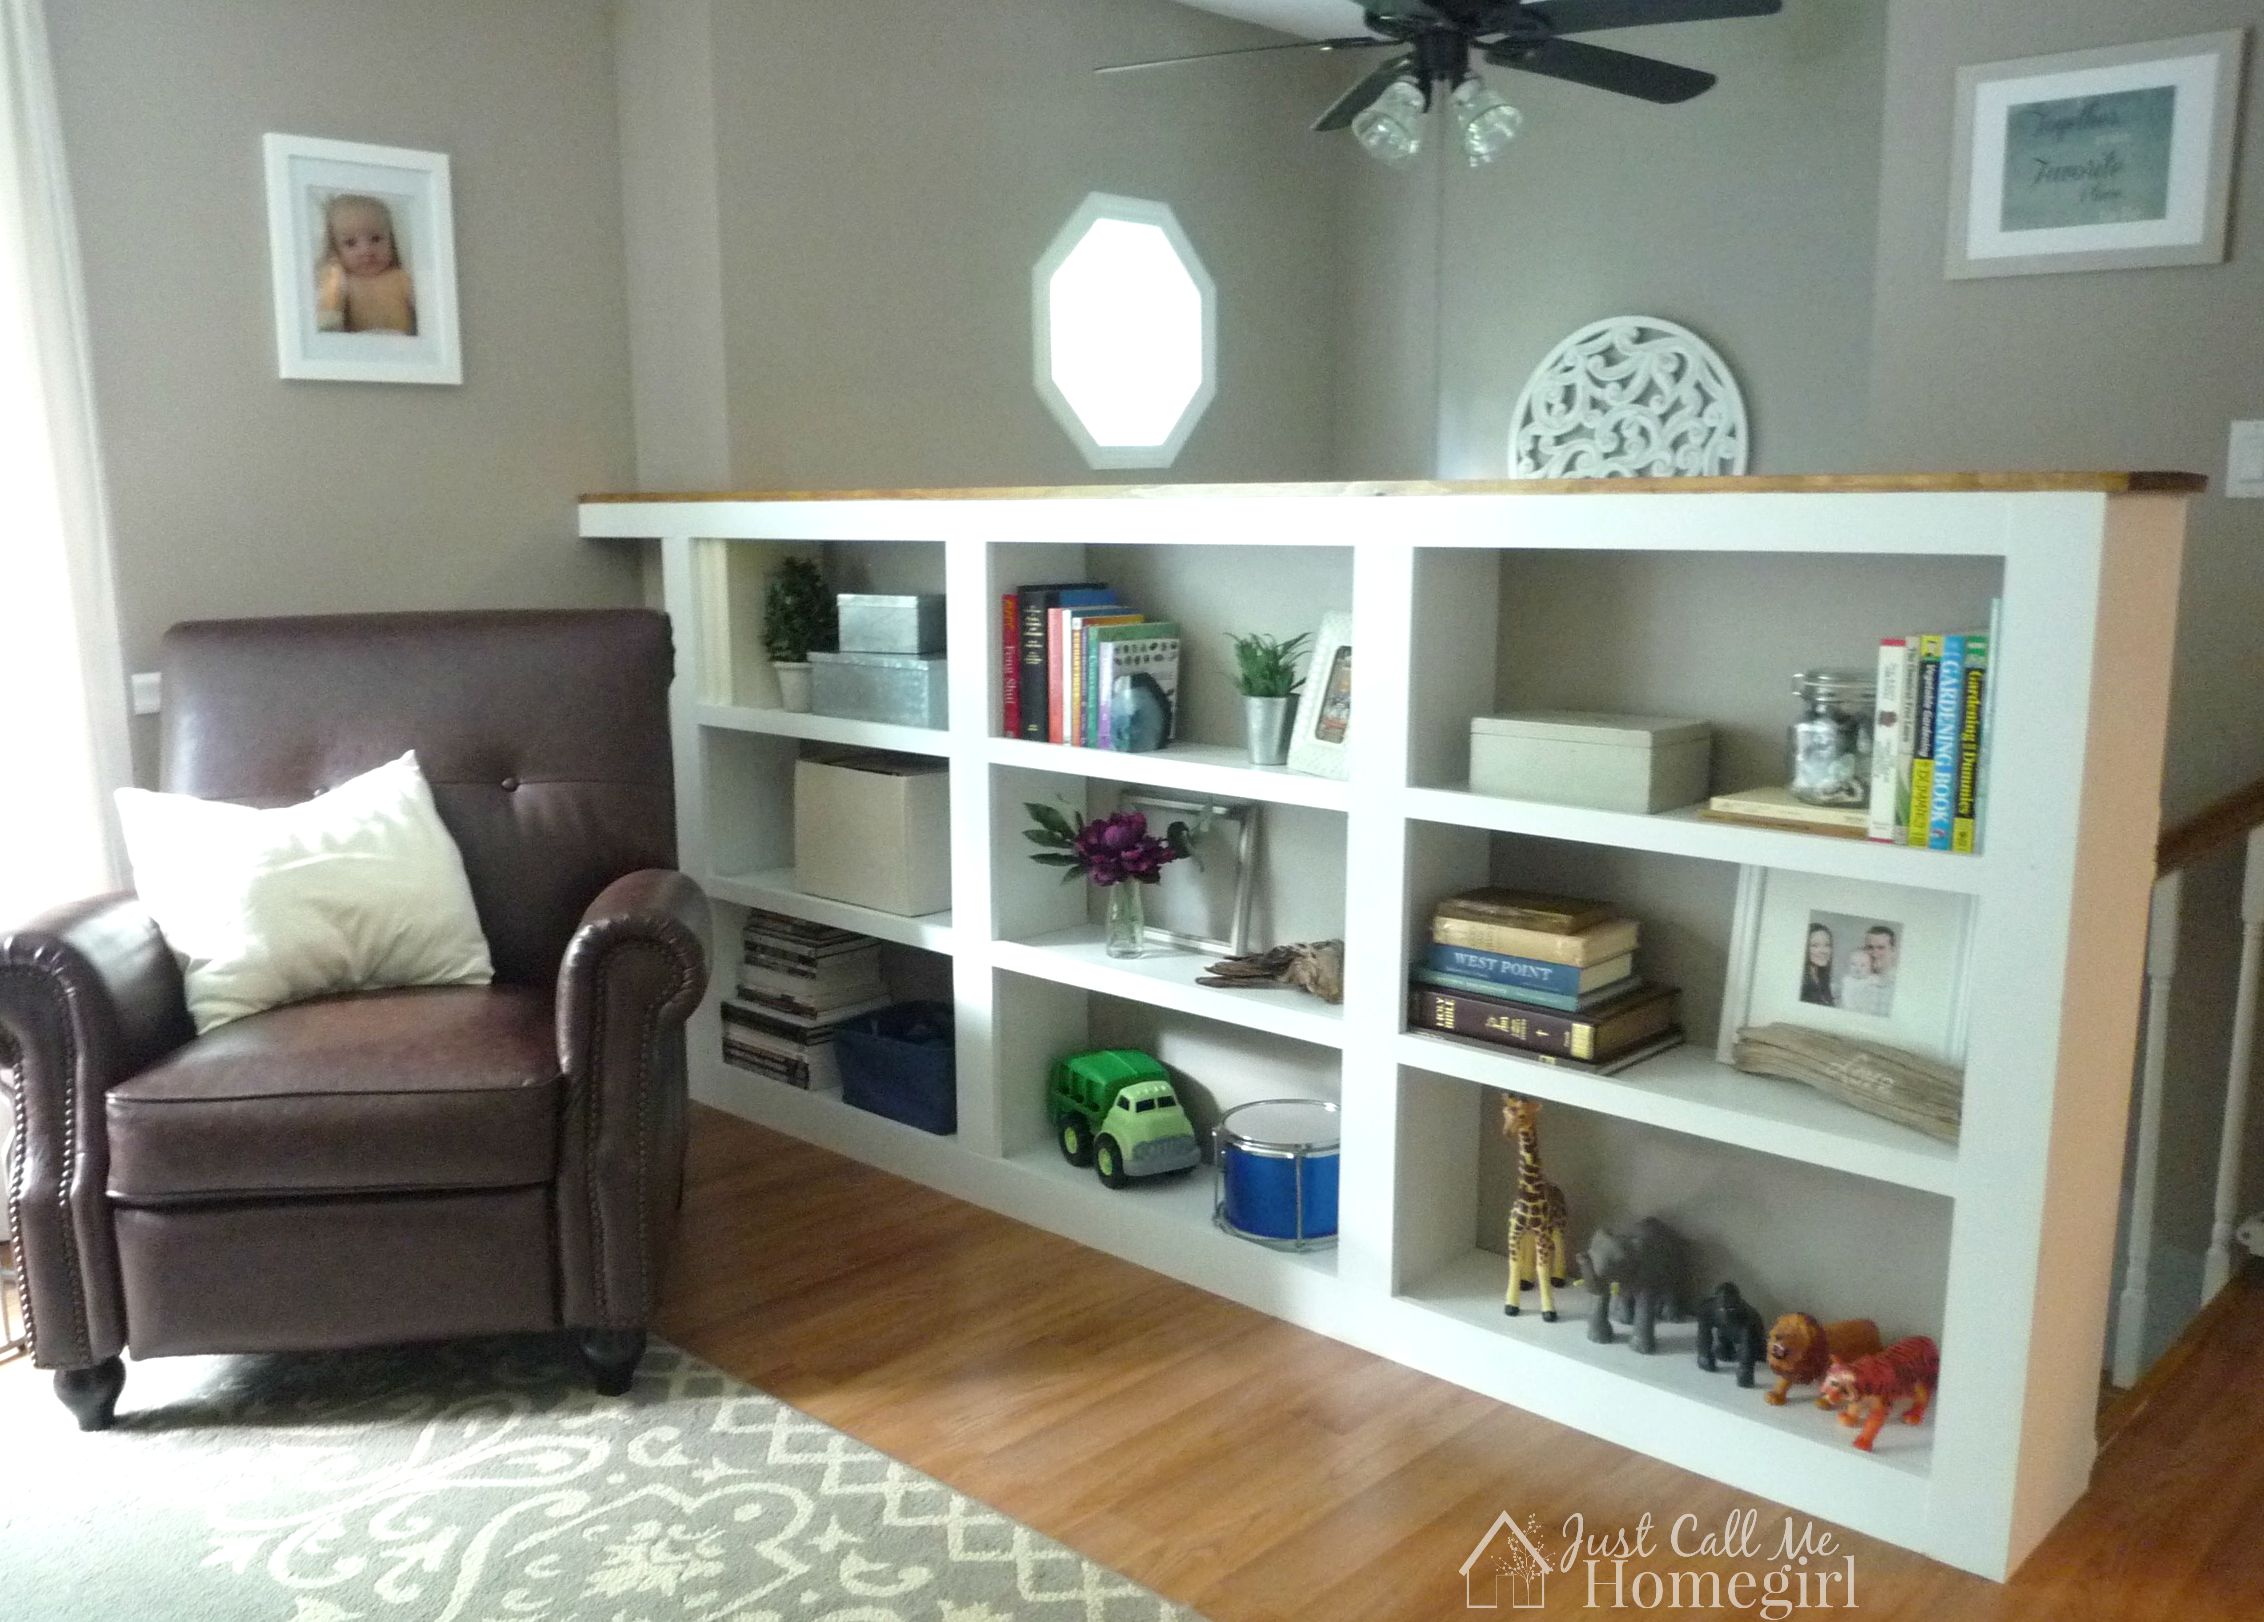
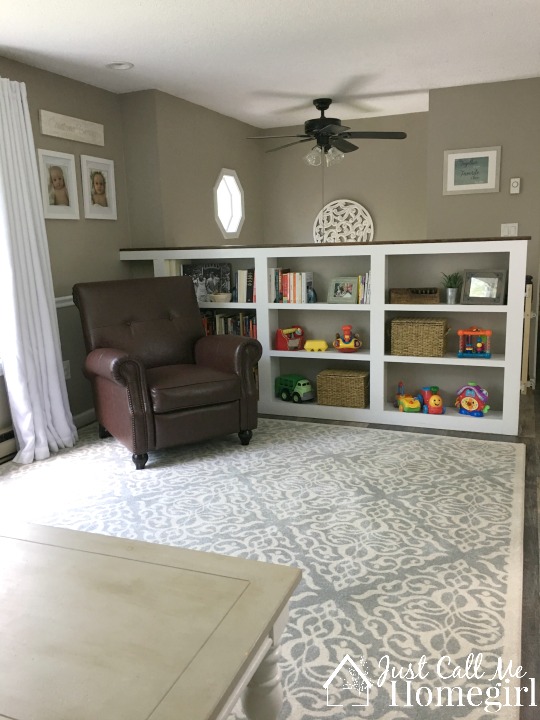
I’m in love! What do you think?
UPDATE:
This post has gained a lot of attention and a ton of comments on social media.
I wanted to address some of the questions and concerns many people have had.
Loss of light: Our living room has a huge bay window, 6 recessed lights, a lamp, and sliding glass doors in the dining room. We actually didn’t notice any light difference when we built the bookcase. As for the stairs, our door has a glass pane, a side window and a window. So it’s fairly lit as well. You can also see the other side of the bookcase here.
Children Climbing: I figured I would teach my children not to climb on it. In our opinion this was much safer than the railing. Which was way too low, and too high off the ground. I also grew up in a raised ranch and we had just a half wall in the same place and a couch pushed up to it. I never climbed on the couch to the wall…and my husband also grew up in a raised ranch but with the railing and he tells stories about how he would walk on the OTHER side of the railing! Call me naive but I prefer this option. Update: My son is 8 and my daughter is 5 and they have yet to even attempt to climb the bookcase.
Closed off the room: Take a look at the photo’s below of the other side. I think it’s open and cozy.
We built this railing 11 years ago and our living room has had some beautiful renovations..including this bookcase! This year I built cabinet doors for it! It looks amazing and you can see how I did that here.
If you’re wondering what I did with the railing when I took it down you can find out here!
Also if you want to see what the other side looks like now take a look here!
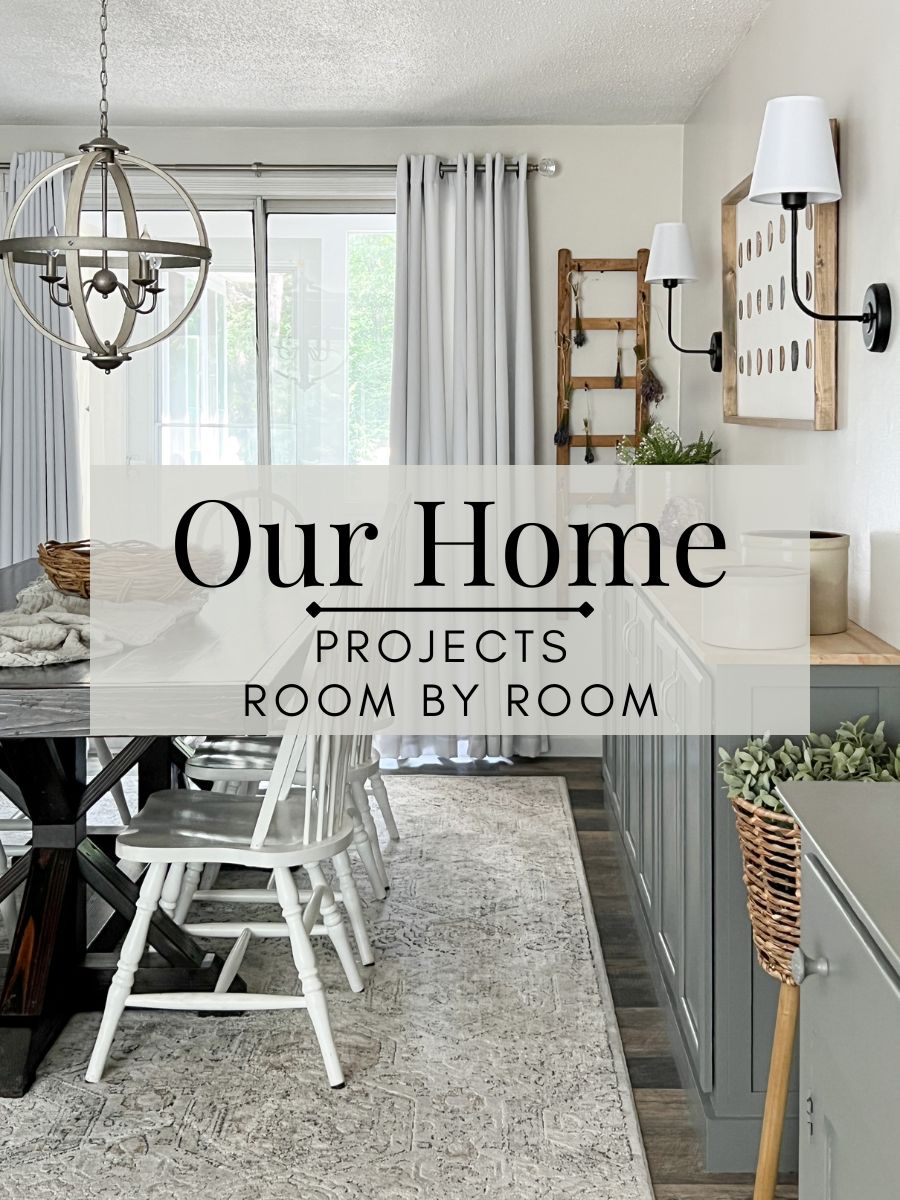
To see all of the project an sources for the living room you can find them here.
Follow me on Instagram here to watch my projects happen in real time!
I think this is fantastic! My parents stairs are exactly the same and I have been trying for years to get them to do this. What does the rest of the railing look like or did you leave the rest metal?
Thanks Karin, we replaced the railing too, I will post that soon! Thanks for stopping by!
I think it would not have had to be that tall.
I would like 6 to 12 inches off the top.
Looks great! What did you do about the railing going down the stairs? We have a similar situation which I’d like to change too!!
Thanks Suzanne! We replaced the railing too. Will post that soon!
Well done!
I’d like to see a front view of the heat pass-through. What did you do to hide what’s behind the wall and still get the heat effect?
Hi..Saw this on Hometalk..posted a couple of replies. Please do post pictures of thehandrail so people can calm down! we had the exact situation, split leverl, you did a fantastic job, and I am sure with kidlets it works just great for you. for thos who wouldlike a more pleasing bookcase to look at..whenyou kids are older and can manage baskets etc..plenty of time. thisis such a great idea to contain all that stuff…and you are right abut seeing all the dust buinnies comingup the stairs!! except we had carpeting, that was before everyone changed to ‘wood’ floors. I put in a very light beige heavy carpet…what ever was I thinking?????? Fortunately we had to move after the remodel..so I didn’t get to see it get trashed! ha Do post more pictures on HOmetalk on this same post so all the scaredy cats can see ‘the rest of the story’.
Thanks Bernice! I will when I get a chance!
I am doing this but turned it around so the bookcase faces the stairs for added interest in my boring entry and so I didn’t lose wall space in my small living room! Yours is beautiful!
Hi Cheryl,
I’m doing this exact thing! Shelves facing the entryway. I’m curious to see how yours turned out and/or if you have any advice! Thank you!
Great Job! I have a friend with the same type of stairs. I have been trying to picture something similar to this at the top because they have a 2 year old and I worry about her with those stairs. Would love to see the back side of the bookcase and down the stairs as well. I will wait until you post it. Also, if I may suggest, the round art that is on the wall behind the bookcase across the stairs should go up a little higher now and maybe put something else below to offset it. You absolutely did an amazing job on this!!
Oh, I love it, it looks so much classier! As for the “clutter”? Favorite books, photos, and accessible favorite toys for your precious little ones-it’s easy to see what and who you treasure most! And the old railing with its easy to grip bars is irresistible to climb! I should know, we all did the same thing your hubby did-walking on the OUTSIDE of the railing, as kids, plus jumping off onto pillows on the stairs. A wonder we didnt break our necks. Your idea is
so much safer! Kudos!
I love the bookcase and it looks fantastic! I don’t have built-ins but I do have tall bookcases in my living room that go against the whole back wall. Everyone doubted my vision telling me it would make my room look small and cramped. I painted them to match the wall color and so they would blend in nicely. Well it did just the opposite! So thanks for addressing the nay sayers!
Omg! You must’ve read my mind! I have almost the same exact situation! I envisioned what I wanted to do, now, after seeing your post, I have an actual picture to show! It looks amazing!! Great job!
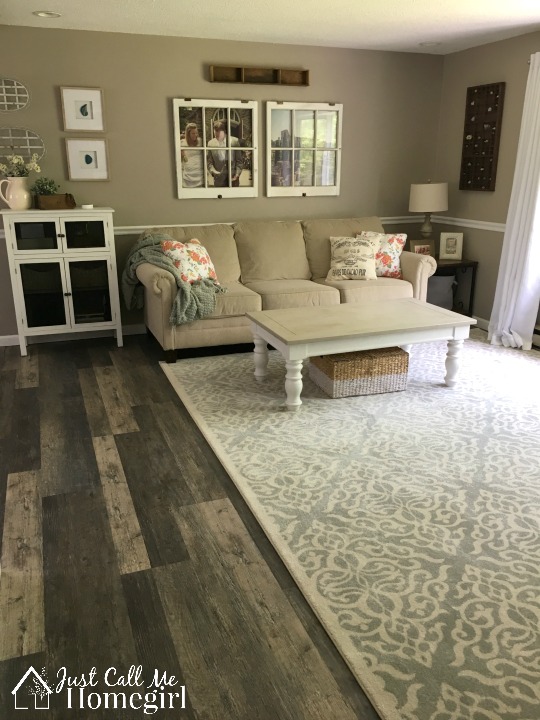
Love this!!! And I love your decor :). I’m sure you painted that Gorgeous coffee table!! It’s wonderful. Do you mind sharing what you used? I Got here from Hometalk. I will check out your site! Thanks so much for sharing.
Thank you! I did paint that coffee table just last weekend! There is a before/after pic on my Instagram account. I used American Decor Chalky Finish Paint. Thank you for stopping by!
I adore the look of a built in book case. It really looks like it belongs there, besides, that ugly railing was so skimpy looking and soooooo outdated! Excellent job. Can’t wait to see the rest.
This is a wonderful transformation! The raised ranch has always seemed like one of the most difficult models to update. Your design is a real game-changer for the 70s classic.
I have this exact set up with rails. I had given a half wall a thought, but never a bookcase. This is beautiful! I’m guessing you don’t watch TV in this room. I almost have to have the “railing” wall for a couch to see the TV on the other wall. I’m not sure about you, but I’ve torn down all the walls in the kitchen and dining room. I do have a half wall from the kitchen to the living room. I subscribed to your blog to see more wonderful ideas for “my” house!
Hi Debbie! No I don’t watch TV in this room, we have a family room downstairs. But you gave me an idea that maybe you could take out some of the shelves and put in a TV…so it’s a built in entertainment system! Just a thought that popped into my head reading your comment! We only have a small wall between the kitchen and living room but we put in a “pass thru” to add light into the kitchen…again that’s for another post!
Yes, I have a room downstairs with a TV as well. I live alone now so I stay upstairs mostly. I showed my son your bookcases and he’s ready to hire someone LOL He loved it too. Thanks for the reply and I wish you all the best in 2015!
I love this idea. We have a similar lay out. I wanted to have the same thought but put cubbies on the stair side to help with our entry way problem. What are your thoughts on this? is it realistic? thanks Jenn
I totally love your idea, design, and the finished product. If the nay-sayer doesn’t like the “clutter”, then she doesn’t need to have it in her house. Haters gonna hate .. just sayin’. I think your whole start-to-finish is brilliant!!
Based on your pics, our floor plan us very similar, if not the same. Even down to the baseboard heaters, LOL. I love the addition of the bookcase. Our railing is wooden and we have a sofa in front if it. Would push for hubby to change it based on your design if we had small children around all the time. Great job with the redesign!
We just did this same project for our stairs, although we don’t have a raised ranch, and I’m so enjoying the finished result. Good job! It’s smaller but the same idea. Great minds, I guess!
We have a split-foyer (that’s what it is called here in Georgia) but it’s the same design. Our wall is built in and the room in front of the house is the dining room. I have always thought I should have a cabinet on the wall next to the stairs. Your design helps me to visualize how I want to redo my dining room.
I think your design is a perfect solution and you have plenty of room in your front room.
I love this! What an awesome idea! It looks so cozy and inviting. I don’t get the “clutter” comments, because it doesn’t look cluttered at all. In fact, it looks lived-in and enjoyed! As an avid reader, I would never leave this area. Great job!
Love the bookshelves!
We have a raised ranch, too. I also never wanted one, but ended up buying one… LOL
Fortunately, we only had the railing on the living room floor. There is a solid half wall between the up/down stairs, that becomes a full wall at the top of the up stairs.
The 20-year-old (or so) railing had become unstable about a year after we moved in and was removed. A heavy love-seat had been used as a “wall” for about the next year, until I enlisted my brother to help me build a COMBINATION SOLID AND WOOD-RAILING HALF WALL. Even though there are small sidelights/windows, to each side of the solid front door, I didn’t want to “close in” the too-small entry with a completely solid wall. Having a completely open floor-plan for our living room, dining room and kitchen, keeping the entryway somewhat “open” was pretty much a requirement.
We built a regular, 42″ HIGH, SHEETROCKED WALL, which extends from the front wall of the house, to about the middle of the five stairs going up to the living room. This wall PROVIDES SOME PRIVACY between the entry and the living room, and it also gave me a place to hang a mirrored mail sorter and a key rack by the front door.
And, a STAIR RAILING “WALL,” TO KEEP AN “OPEN” FEELING. A 3-1/2″ round top, plain newel post was attached to the end of the half wall. We used 3-1/2″ shoe rail for the top and bottom rails. (Since the shoe rail is only 1″ thick, it kept it from looking too “top heavy”.) Eleven 1-3/4″ “Hampton” balusters, and another newel post on the end make up the rest of the railing section. (All from Lowe’s.) To make things easy, we used the balusters themselves to space them evenly across the railings.
TO TIE THE SECTIONS TOGETHER, the solid half wall section is capped with a 1/2″ x 4″ (3-1/2″ actual width) red oak board, stained to match the other oak pieces.
Having a toddler and two large dogs at the time, we installed a wooden baby gate at the top of the stairs. By using a solid, square newel post, we were easily able to install the gate closure hardware on the unadorned post, with the gate hinged on the opposite wall of the top step.
Our DIY wall (and the gate, used only for the dog now) has served us well for over ten years now!
Although raised ranches are usually boring, cookie-cutter homes, it doesn’t mean you can’t make some fairly easy changes to MAKE IT YOUR OWN!
P. S. For other raised ranch owners: Our refrigerator is in that same location, with a coat closet across the hall from it, at the top of the entry stairs. Well, I hung coat hooks on the wall behind the front door (and created more outdoor-gear storage beneath the “up” stairs,) and TURNED OUR COAT CLOSET INTO A PANTRY! We don’t miss the coat closet one bit, and we all love, love, love having the pantry storage!
We did the same tongue coat closet! WE also installed a pantry at the other end of the kitchen. Everyone loves it and we have the much needed storage the rest of the house seems to lack ♡
We have a raised ranch too, although here they’re called ‘split-level homes’. I love the idea of the bookcase! We just have a half-wall there. We have a fireplace where your couch is though, so our couch is where your bookcase is. Ah well. I’ll just admire yours 🙂
I LOVE this! But do you keep a TV in this room? If so, where?
Thanks Shannon! We don’t, we have one downstairs in the family room. But I was thinking if we ever did, we could adjust the shelves and put it right in the bookcase!
You can float the sofa in the middle of the room, or in front of the window, or pull the sofa out just 1 or 2 feet out from the new bookcase play with the room you will figure it out.
I have a similar staircase. I want to build a half wall to get rid of the rail on top. There’s no room for a bookcase and there’s no natural light in my entry, plus the door at the top of the stairs is a bathroom! =\ I’m trying to convince my husband to build a half wall & either change the entry doors with glass ones, or put in a skylight…oh if only we were rolling in $$$
Just closed on a high ranch can not wait to do this! Plus we have a baby on the way and think it is better than the railing!
Wow, this looks AMAZING. Great job!
Hi, Thanks for the beautiful inspiration. I’m wondering how long it took you to complete it? Also, cost wise, was it pretty reasonable? Thanks for your input 🙂
Hi Kayla! Thanks for stopping by! It took roughly 2 days to finish. Maybe a coat of paint here and there after that. But you could donut in 2 days no problem. Cost wise, I believe it was under 300. So I think it was a great investment! Good luck and I would love to see pictures of you decided to do it!
This looks amazing! My wife and I are considering a similar approach. Did you remove the hardwood flooring before securing the bookcase or did you place it on top of the hardwood? Did you have difficulty locating a floor joist? We worry that we will not be able to adequately secure it to the floor without removing the hardwood first. Thanks!
Thanks Joshua! No we did not remove the hardwood and by creating the “frame” with the 2x4s on the floor first it is extremely sturdy.
Looks great, and I’m totally stealing this idea for our upstairs. Right now we have an ugly banister around the stairwell, so I’m going to do more of a U-shaped version. Two questions:
1 – I assume your bottom shelf is a 1×10 over the 2×4 boxes. So does the 1×4 you used along the very bottom not cover the front edge of the actual shelf? It appears to be flush in the photos, but the math isn’t making sense to me (3.5″ height 2×4 + .75″ thickness 1×10 = 4.25″, 1×4 along the front would only be 3.5″ in height)…
2 – Do you know how the 2x4s were attached to the floor underneath? I’d assume some hefty screws, possibly put in at an angle using a Kreg jig.
Thanks Mike! The 2×4’s are actually laying flat on the floor, not on their side. So the bottom shelf is a 2×10. We also screwed them directly into the floor.
I would love to see a picture when you’re done!
So your wood shelves are actually 2 inches thick like the 2×4? I can’t even find something like that at our hardware stores! I’m jealous. How much does something like that cost? A 1×10 piece of pine that is 8 feet long costs $18.00.
Oops I just checked and we can order it in from the mainland and a 2×8 piece of oak is $100 and a 2×8 piece of maple is $130.00.
Robin,
Not to answer for Tara but I believe she used KD (kiln dried) framing lumber. At most Home Depots you can purchase 2 X 10 X 8′ KD Fir (much nicer than spruce or pine) lumber for $9.67 each or a 12 footer for $14.46. This is a much smarter choice than either oak or maple for a painted piece. With minimal sanding the fir lumber will finish nicely. It would be a totally different story if you are planning to stain/poly the project. Another note………..1 X 10 pine is considered finish lumber and will always cost more than 2 X 10 framing stock. It will also come in different grades that affect the price.
Hope this helps.
Thanks for that info. 🙂 I checked and can special order some kiln dried wood, they were unsure of the species but they think it’s for, for $22 for an 8 foot length. That’s perfect for me. I am amazed at the price differences though. Although I am on the east coast of Canada and everything is expensive here.
We just bought a raised ranch – swore I would NEVER growing up I LOVE this and have had it pinned for a while! Only thing I’m not sure on is how you properly secure the wall/boxes to the floor to withstand… Well, children lol house of boys over here! I want to make sure it won’t break if someone is pushed into it lol
Posted to quickly
Do you think it would be a poor decision to leave the iron railing and build around it… For extra support?
I also have my master to do list. This house was INTSENLY painted and tiled when we bought it. INTENSE. But I am DYING to get this railing taken care of. Right now we have a target bookshelf laying on its side with baskets shoved in there for toys
Thanks Madison, If you leave the railing you’re going to loose that much space of shelf. We secured the 2×4’s directly into the floor. This bookcase is extremely sturdy. Nothing is pushing this thing over. Because I used 2″ width boards adds to the strength including the sheetrock continuing all the way down the back wall. Not just stopping at the floor.
I live in NE Pa. Several years ago, after our older toddler of two fell down the stairs, I had several changes built in to also handle summer/winter and daylight issues. I have a Dutch door at the top of the stairs when entering the living room. A coat closet remains to the left. On the right is a wall with framed window opening and adjustable shutters. This helps with regulating climate of the downstairs space, the entry, and the upstairs space. I still have two lift chairs installed on each stair to accommodate my husband who died from Parkinson’s Disease. I use them as dumbwaiters. One railing (of two formerly) remains for each stairs, one down and one up.
Great job! I can wait to tear down my railing, I’ll be incorporating a spot for my TV.
Hi HomeGirl…………well it appears you have inspired yet another split entry first time home buyer with your bookcase idea. Being a friend of the family, and a cabinetmaker, I have been asked to build something similar. Could you please give me the finished height of your bookcase. This sweet young girl would be much more inclined to accept the height I am proposing if it came from your lips. She wants 36″ and I feel more in the line of 42″ is necessary to fit some nice mouldings and still have room for three rows of books.
Thanks…………….great job!
My mom has a home on Long Island just like this!! A high ranch built in the mid 80’s with that ugly wrought iron railing!! This is a great idea! Could you please post pics of what the other side looks like? And what did you do to the remaining railings going up the stairs ? Your bookshelves look great ! Thanks!
I love this! Such a refreshing change from the “typical” iron rail, and functional as well! 🙂
This is brilliant! What a great replacement for the old railing…beautiful job!
Lets see rest of the stairs on the other side of the bookshelf. I have a similar problem. I hate my old 1980s wood railings.
Great job! Here in Massachusetts we call them splits but the same thing. I have been thinking of a half wall for a while either a glass block wall or a cabinet wall. Now that I see your bookcase I like it! Question: How close did you go to the edge of the flooring on the stair side? Since it has that finished rounded edge I have been thinking of doing the same thing but making cabinets with doors on the staircase side. I have a fireplace on the far wall so our sectional is against this railing. Wondering how close I can get to the edge.
Thanks Ann! Ours didn’t have the rounded edge on the floor. So we went completely to the edge. If you look at the picture of the backside you can see we were able to go to the edge and put the Sheetrock backing all the way down.
Hi! I just did this bookcase and love it!! May I ask what your wall color is? I love it!!
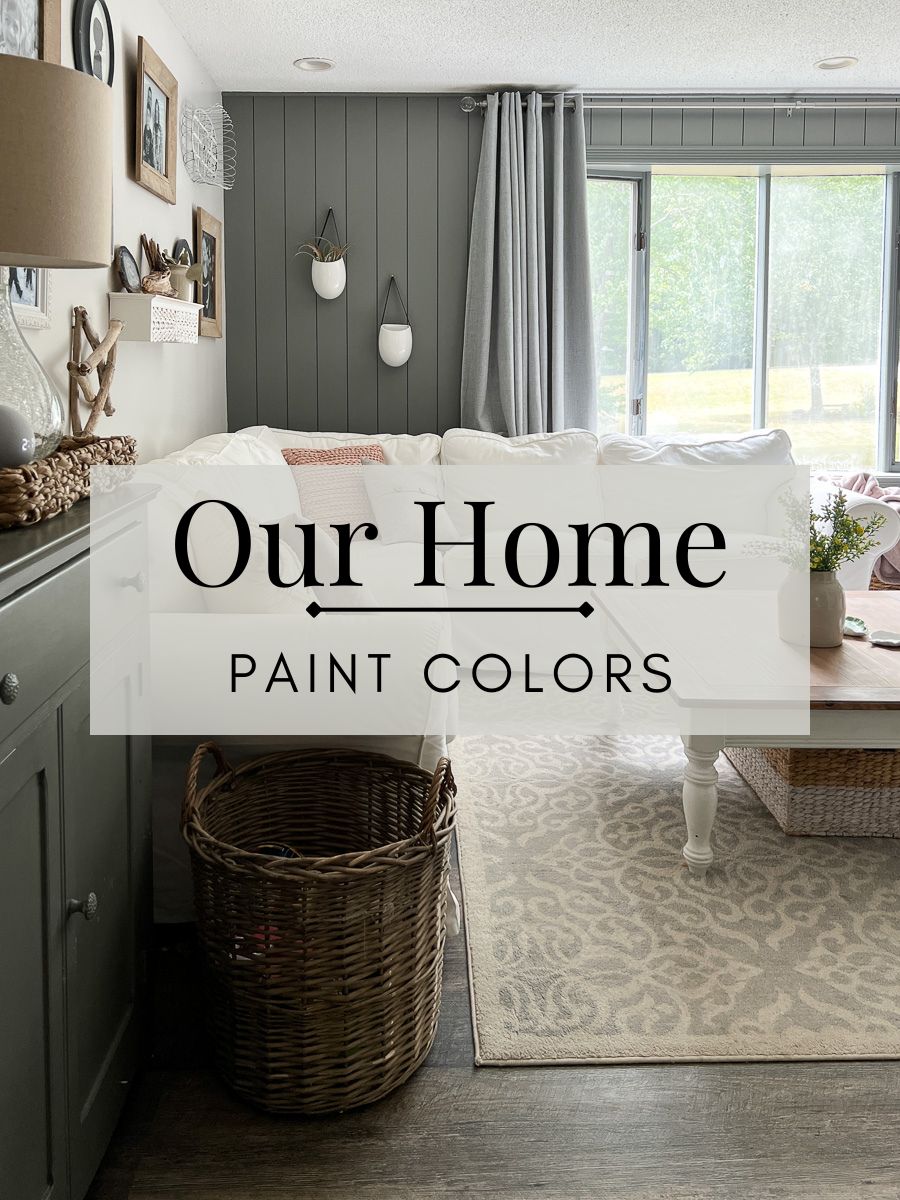
I’d love to see your bookcase! The paint color is Perfect Greige by Sherwin Williams.
How did you secure the shelves to the floor?
Love this! Maybe I missed it but do you mind telling me the paint color you used on the walls?
Thanks Kandra! It’s called perfect Greige by Sherwin Williams.
This is just what I pictured for our split level!! We just bought the house this month and adding a built in to replace the metal railing was at the top of my “to do” list! So a quick search on Pinterest led me to you, Im thankful to add a visual picture to my mental one. I hate split levels but I’m determined to make it awesome. I love your idea of adding a hole to the room below to let the heat from the Woodstove reach the top levels! How is that feature working? Does your foyer fan help to circulate? Is there anywhere on your blog that you share what that room below looks like? Funny how as soon as we moved in, my kids started climbing on the outside of the railing too, major freak out for me even though I must admit it looks fun 😉
Katie, Thanks I didn’t want a raised ranch also but I feel like you get a lot of space for the money. There are many posts on the blog about different aspects of a raised ranch but here is one that shows the start of our downstairs family room renovation. Thanks for reading! https://justcallmehomegirl.com/family-room-renovation-part-one/
Bookshelves at this location were common in bi-levels (which you call a raised ranch) built in the 60’s, complete with a planter along the top.
I want a bookcase instead of railing !! Our TV is in the wall on the other side of the steps. If I could paste a pic I would but I’m on my IPad and can’t. Too bad nobody in my family are DIY inclined ?
This looks great.
I also love that coffee table. Where from?
Got it for $40 at a garage sale and repainted!
Hi! In love with this idea, I have a split level, what are your thoughts on a double sided system for pictures, a place to drop shoes and purses etc, on the stairwell side and the living room side for books, etc
Great idea! I would do the floor level shelves as the ones on the other side.
How did you mount them to the floor? I’m planning on building something like this except mine is much smaller and the shelves will face the other way as shoe cubbies. 🙂
We took ours the ceiling. We are putting in an electric fireplace, a mantel and our t.v. is going to be mounted in and have shelves up and down on each side, quaker type door along the bottom sides. We hardly use our fan in the entry so it’s gone.
OMGosh, love this! Now to find someone to help me do this to my second floor half wall! All that unused space waiting to hold our books and trinkets!! I can’t stand the boring half wall (dry wall with oak slab on top).
Wow that looks just like my house split level entry i like what you did.
I have a similar set up and I very been wanting to do this forever. Thanks to you, now I have a guide. It looks really great!
I love the new floor. Can you give me information on it?
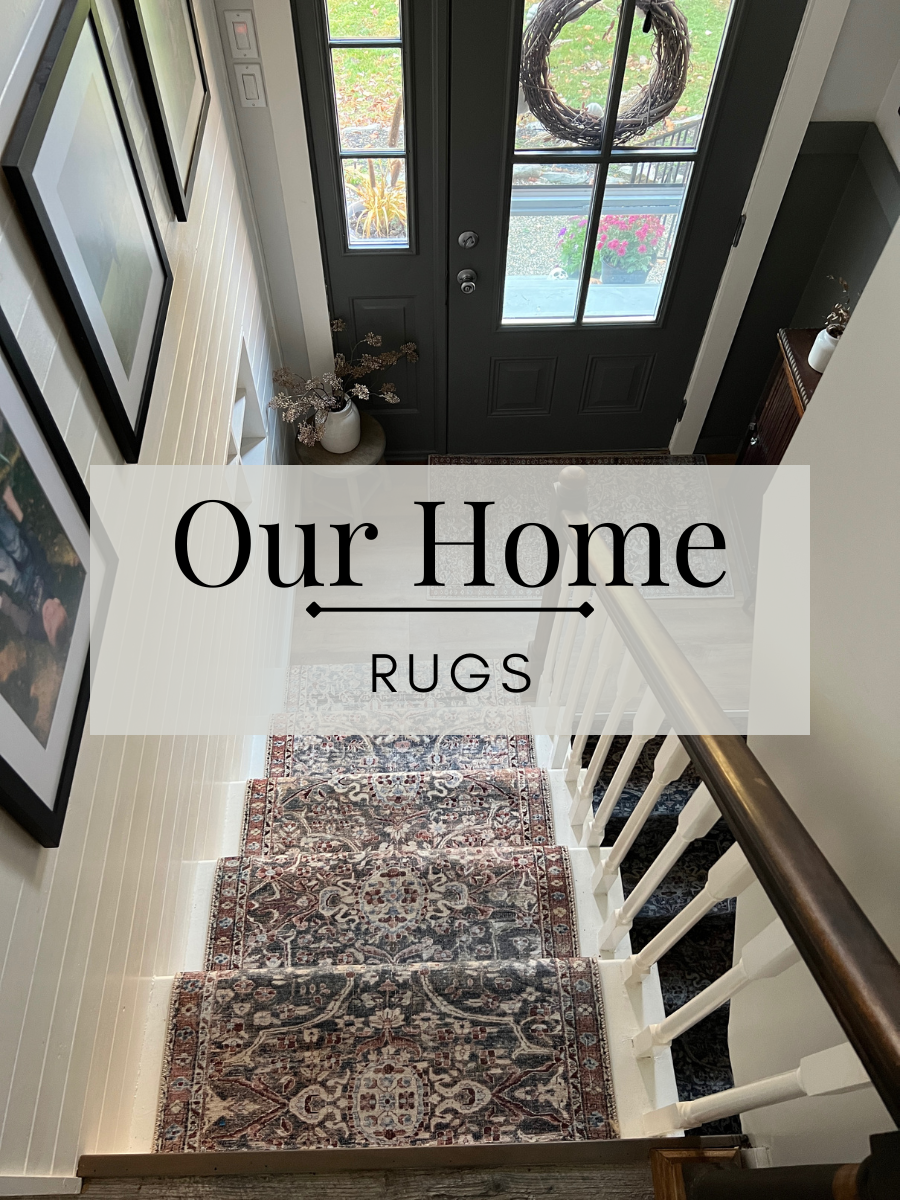
Thank you Cyndi! Here is the post about the floors! https://justcallmehomegirl.com/lifeproof-luxury-vinyl-plank-flooring/
Kevin on November 5, 2015 at 6:17 am had asked about the finished height of the bookcase, but I didn’t see a response. Could you advise what the finished height was? Thanks, JD
The height of the bookcase is 42″ but if I did it again I would have done it around 38″.
This is gorgeous and we will be adding this to our raised ranch with the shelves facing the stairs. Just wondering—how did you get the shelves so level? that is the part my husband is most worried about.
We are remodeling our living room and plan to build this bookcase, though our shelves will face the stairs. My husband is wondering how you were able to get the shelves so straight so they don’t wobble? that is the part of the job he is most concerned about. Thank you.
I’m not sure what you mean by level? The shelves themselves or the whole structure?
Hi, I love your design. We are about to attempt this in our home. We were wondering how you secured the 2x4s to the floor, as well as how you secured the 2x10s to the floor.
Thanks for the idea!
How much did this cost to do.
It was around $350 in materials
We are about to give this a go! We have a 12″ raised platform as our entryway. I know, very 70s but we’re working with it. So we are going to do the shelves on the regular floor, backing up to the 12″ raised part. (The front of the shelves will be 42″ and the back will only show 36″ if that makes sense.) I know it’s hard to picture. We plan on using a sheet of wood as the back instead of drywall. I think we understand how to build the bottom, the sides and the top. But I am wondering what you mean by “shelf pins” because I can’t figure out how to attach the shelves. Do you have any pics of that, specifically? They aren’t adjustable, right?
I can’t tell you how THRILLED I am to find this post!! I have lived with the hideous half spindle wall in my living room for over six years and HATE it so much. I knew I wanted something similar to your new wall but no clue how to DIY this and make the wall sturdy. I have a special needs son and he would love to take a tumble off the back of my sofa over the railing. He just doesn’t understand how dangerous it is. It is not sturdy and just ugly! I have always had to keep the sofa in front of it because it covers the spindles the best so he can’t get to them. I hate the way it looks from both sides! I would love to have the bookshelf configuration you have for decor but think I will use mine for pretty storage baskets for his toys and supplies. He would pull off any decor unfortunately. He loves to explore. I am literally almost in tears of joy at finding this with your plans included! Thank you so much! I can’t wait to get started on it!!
Wow! Thank you so much for the kind words! I love that this will help you and your son! Thank you so much for commenting! I want to see pictures when you do it!
Hi! How did you fasten the frame to the floor, so it would be sturdy enough? I have seen online to use lag bolts, but they seem unsightly, and with this open design, I don’t see a way to hide them. Thanks!
Under the bottom shelf are 2x4s and those are attached to the floor and everything is attached to those.
How do I do this over carpet? My railing leads to the basement and the carpet wraps around the edge under the railing.
Thank you for this inspiration.
I LOVE this, I love the entire room you did a GREAT job with this classic split level that is NOT in style at this time but will make a comeback, someday.
Wrought iron had been the rage back in the day exterior, interior it had been wrought iron.
This bookcase adds dimension and “cozy” to the room and your other furnishings are perfect you have updated this classic split level to a much sought after “today farmhouse country” look.
GREAT JOB!
Y’all dont be so hard on the classic 1960s split level see here what can be done you have hardwood floors, vaulted ceilings, much of the classic split level home remains the greatest to send kids, young adults “down to the rec-room level’ for TV, a pool table, etc., and away from adults is one thing the popular ‘open plan” does not provide.
NEVER count out the classic 1960s split level, or classic 1950s ranch.
Kevin
Can I say what kind of a hero you are to me right now?! You and I have similar stairways in our split levels, so seeing how your bookcase looks helps confirm that yes, this bookcase will look AMAZING in my soon to be dining room.
We already have a “wall” built on the stairs instead of any banisters, which is what I was planning on doing to help open up the room. Then I saw this. GIRRRLLLL. THANK YOU!
Thank you so much!! That’s why I share! To help inspire others!
What size screw did you use to attach the 2×4 to the floor.. Also to make the box for the floor what size screw did you use to attach each 2×4 together since they were on their sides. Probably at least a 4 inch screw?
Does the shelf wobble at all on the right side toward the top of the stairs? We’re trying to figure out how if/how you remove the wobble.
Not at all. The frame is screwed right into the floor joists and there is a solid piece of sheetrock going down the entry side.
Great idea!! Looks terrific!
I think I might not understand something, did you sheetrock continuously up the back of the shelving unit on the back? In other words, does it look like one tall wall from the stairwell? If so, that is truly unique.
I agree with you that this is most likely much safer than the rail was.
Yes we sheet rocked the entire wall. But then if you look at our entry update we added shiplap to that wall in the entry!
I think it was brilliant!
Just a couple of quick questions.
1. how did you secure the 2×4 boxes/bases to the floor?
2. What did you cap off the 2×4 boxes with to make the base shelf? (1×10?)
I screwed them directly into the floor joists. and I beleive I used a 1×10 cut into 3 pieces for the bottom. They were put down after the frame.
Do you have photos of the step where you secured the unit into the floor joists? I’m having a hard time envisioning how that looks and this is exactly what I’m hoping to do at the top of our stairs!
Thank you!
Looks great. Did you think about having it open on both sides? If so, what changed your mind? I am thinking of doing the same but open on both sides so we can store items for when we leave. Maybe keys, umbrella, etc..
I didn’t want my kids to push things through! I did do it that way I would have done the lower shelves open on the other side.
I have been wanting to do this soooo bad recently.
I’m having a hard time understanding the 3 boxes made out of 2x4s. Can someone explain please?