
When we moved into our home there was a chair rail in EVERY room. I’m not even exaggerating. The living room, the dining room, all bedrooms, the family room, kitchen and even the bathrooms!
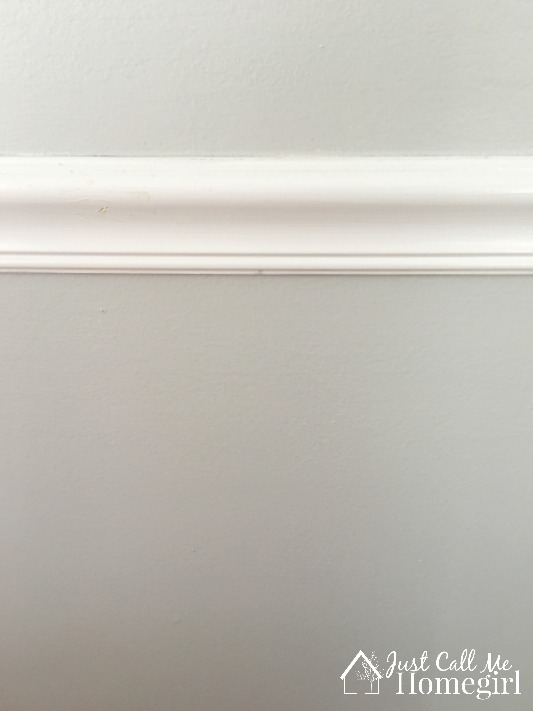
I don’t mind chair rails, but in every room is a bit excessive. I have slowly been removing them as I see fit when I repaint a room. I removed it from our family room and my daughter’s nursery and now we are in my son’s room.
I consider myself a little bit of a pro on taking off a chair rail. I used to just wing it and then I would end up with more damage than I hoped. So here are my tricks and steps to taking off a chair rail with minimal damage!
Some of the following links are Affiliate links. Click here to see my full disclosure.
How to Remove a Chair Rail
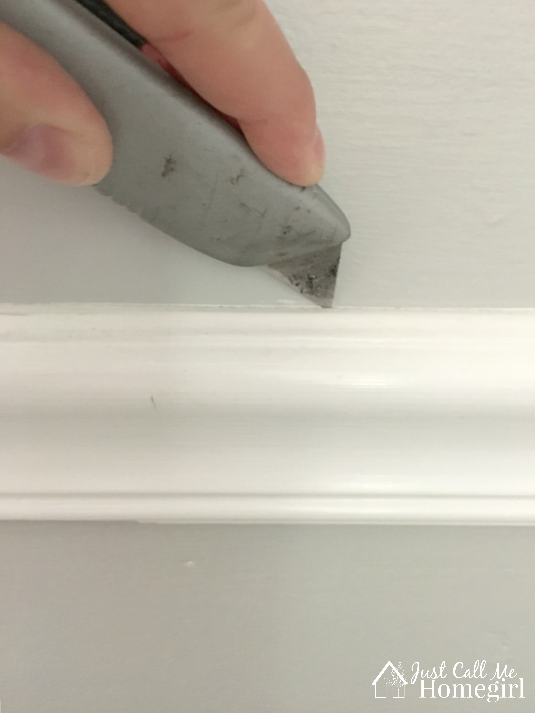
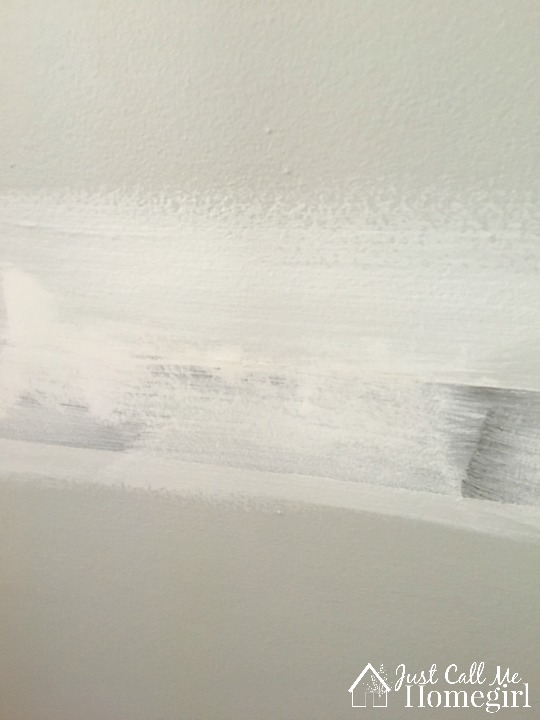
The first thing you must do for minimal damage. Using a utility knife, go along the top and the bottom of the chair rail to cut any caulk and any wood that is stuck to the paint on the wall. Leaving you with less peeling of sheetrock layers.
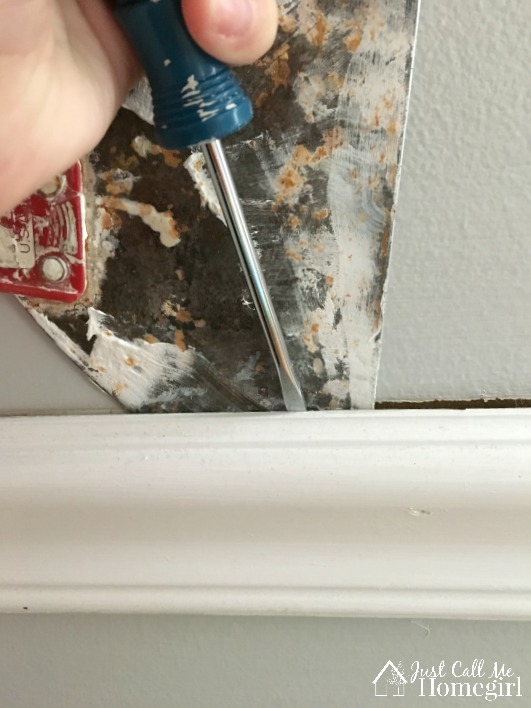
Then using a sturdy putty knife gently wedge it behind the chair rail preferably where there is a nail or close to it. Using a screwdriver or, trim puller, put the screwdriver on the putty knife using that as a block. If you didn’t use the putty knife and just started to pry it off you would leave more dents or even holes in the wall from the screwdriver.
Move along the rest of the chair rail prying it off. Hopefully it will come off easy with little damage.
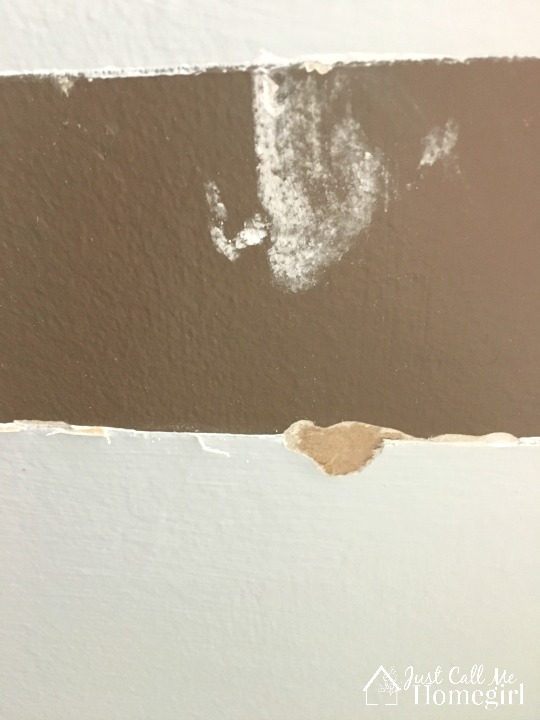
Sometimes you might have a spot the peels, that’s okay you have to fill in the nail holes anyway the peeling will be an easy fix if it’s small.
I then start the layering of spackling paste, I like Dap Dry Dex because it goes on Pink and turns white when it’s dry, going over the holes and any spots that need to be repaired. Work in thin layers sanding in between and add layers as needed.
Once the last coat is dry give it a final sanding. I like to use sanding sponges. They are easy to hold and work really well.
Once smooth, you NEED to prime. You should always prime new sheetrock and spackle. If you don’t prime it will suck in the paint and create splotchiness.
My whole trick is using the putty knife to protect the the wall and I pry off the chair rail. Before I would not use anything and I would leave large holes in the wall from my screwdriver or hammer working the chair rail off!
If you don’t have a putty knife to use as leverage, you can also use a felt pad on the back of a hammer to prevent scraping/denting the wall when prying the chair rail off.

You Might Also Enjoy…


Great tips, I’ll be removing baseboard moldings this week so this will come in handy!
I want to remove some chair rails, but one of them is on a wall that is part of a vaulted space….VERY high! Any chance I can get away with removing the rails but NOT repainting the whole wall? Maybe tape above the chair rail line and just paint from there down…..or would that be noticeably awful? Thanks!
Does this leave a smooth line around the room? Just wondering if there will will be a texture difference with the bumpy wall and where the sanding happened
Nope that’s why you sand. If it’s bumpy sand again!
Love this tutorial. Her question sounds similar to the one I have… not the bumpiness of the spackle, but the actual wall texture. When you sand the spackle, it will be so smooth and most walls aren’t smooth but have a texture. I worry there will ne a weird smooth texture where the chair rail was. You didn’t have this?
Thanks.
We have what is called knock-down texture in our house. You can actually buy a can of spray texture and depending on what you have you would then work with it or leave it be. We have to use a flat sparkle knife to flatten the texture spray in downward motion. Hope that helps?
Unless you have a knock down or other sprayed texture, using a thick 1/2 roller will add a little texture if the normal 3/8 roller doesn’t do enough in paint coat #1.
Hi! I used this method and the removal was easy but now after I have applied joint compound and sanded it looks too smooth! Help?!
Hi read ur post about chair rail removal. Would this still work on mine if been on for 20 years
I don’t usually leave comments but my house is exactly like yours… chair rail molding in every room! Thank you for your tip, I’m so excited to try it out and re-do my little Airbnb guest room!