
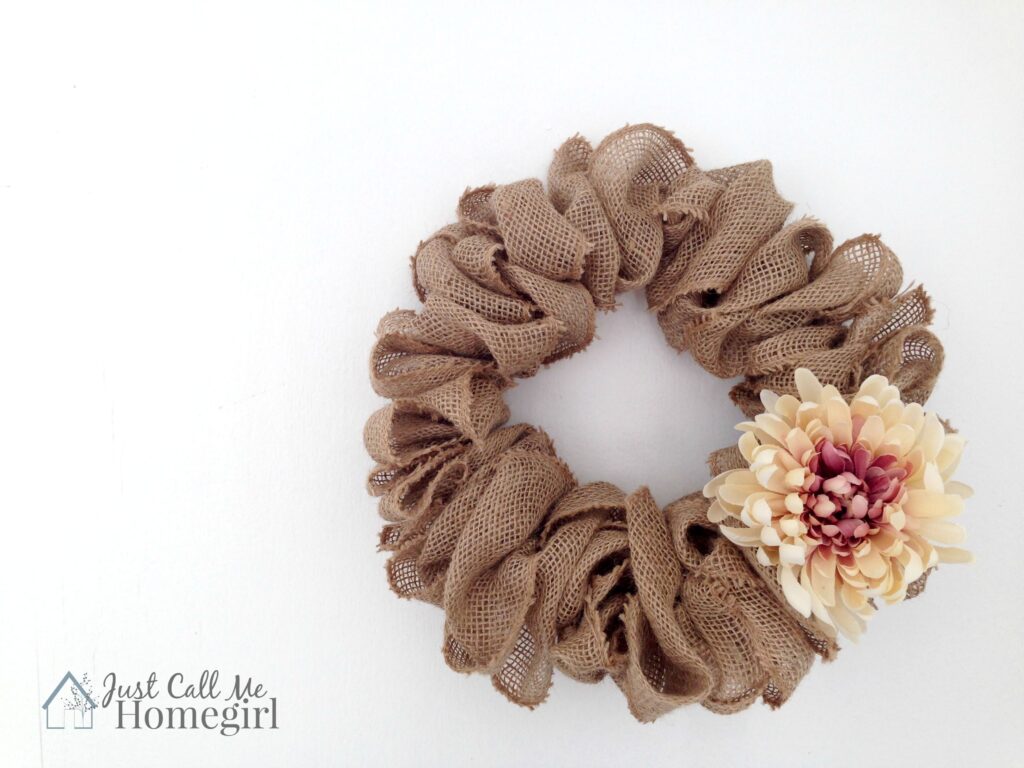
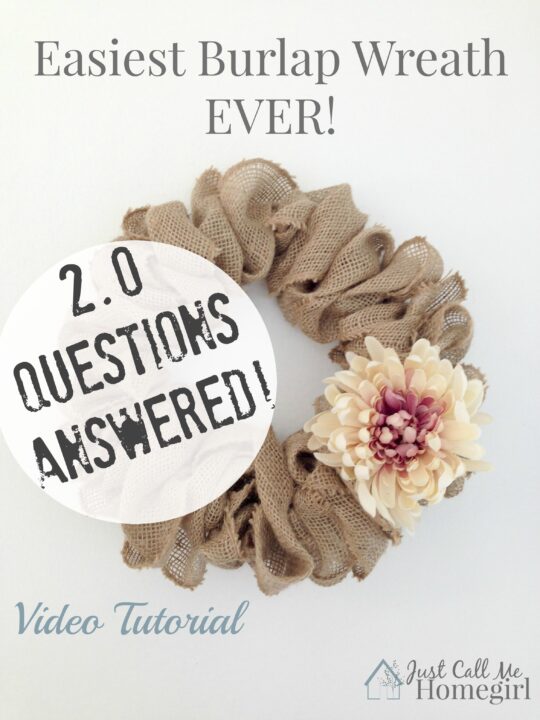
This Burlap wreath has gone viral many times over the last 5 years because it’s easy and so versatile. It can be used for all holidays and seasons with a switch of embellishments.
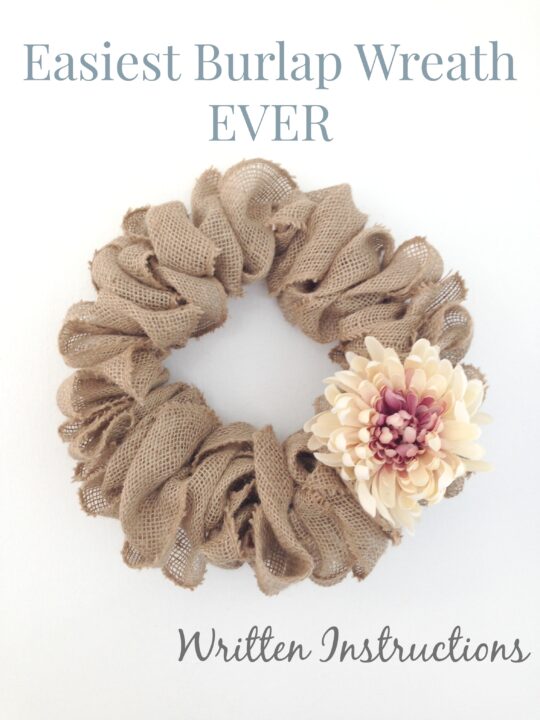
The first post on this wreath was just a written tutorial you can see here. The Easiest Burlap Wreath Ever, but I received so many questions I created a few videos to show how easy it is.
If your having a hard time following along, take a look at the written instructions.
Some of the following links are Affiliate links. Click here to see my full disclosure.
One of the most frequently asked questions I always get about this wreath is how much ribbon did you use and what size? It depends on your hanger or wire that you are using for the ribbon but a regular sized hanger you will need about 10yards but if you want it a little more fuller and tighter I would use around 15 yards. I used 5″ wide ribbon. This is the ribbon I used.
It’s so simple and you only need a few supplies: (affiliate links, see full disclosure)
- Metal Wreath Hoop – If you don’t want to use a hanger I have used these and just cut them with tin snips or metal cutters in one spot (then taped back together once the wreath was made.
- burlap ribbon (I used just under a 10 yard roll/ 5 inch wide)
- wire hanger – you can usually find them at thrift stores, dry cleaners, re-stores etc.
- Embellishments you might want to add.
Still have questions or would like to see different alternatives to this wreath like having two colors, making it bigger or not using a wire hanger? I showed them all to you on a Facebook Live you can watch below!
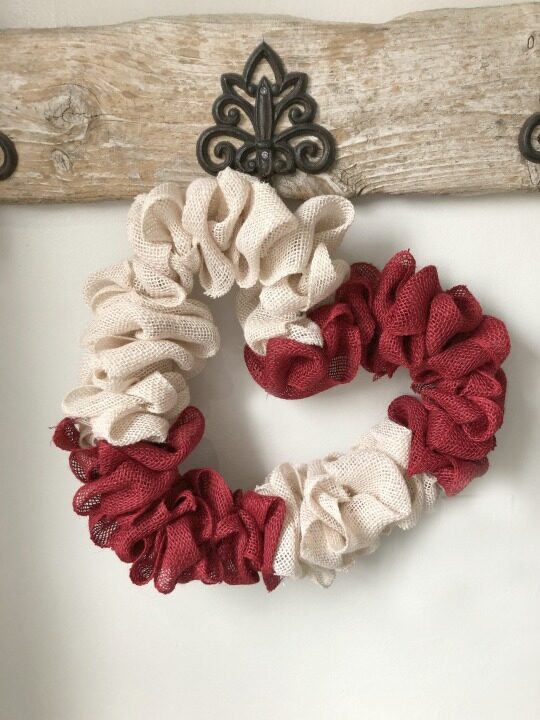
This wreath can also be made with with different colors as well as different shapes like the heart one below!
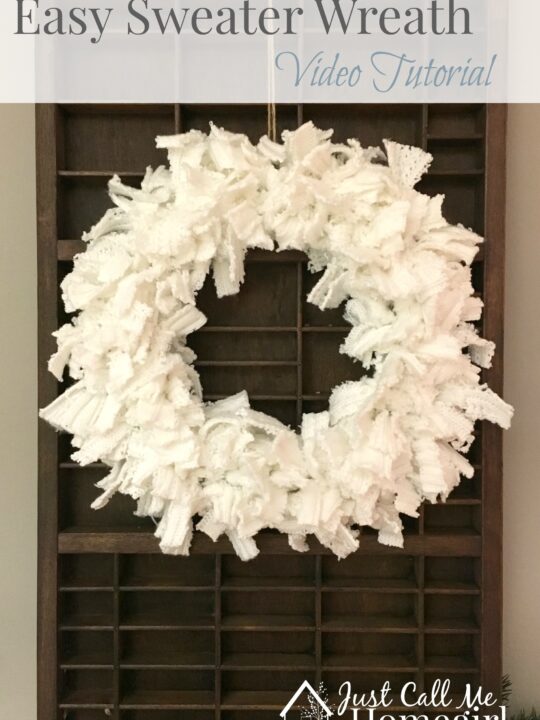

Wow! That is so clever and it came out so cute! I see you have an upcycled sweater one too. I’m going to go check that one out now.
I found the video hard to follow once the speed increased. Is there a way to access just the verbal directions or to slow the video down? Not user friendly.
I have made 8 since I saw the video, gave two away already for birthdays that were beautiful and fall looking. The others are all Christmas gifts. I am soooo enjoying this and I am not even that crafty.
I couldn’t find the green burlap so went on line and ordered it from Amazon and can’t wait until that comes, have some good ideas for those. Love it
I can make that. Beautiful job. Can you imagine what you can actually do with a wreath like that.
Thanks for video. This looks very easy and doable. I am going to give it a try. Thanks for the motivation and instructions.
You could do halloween (use an orange and black bow on it, or make a bow with Halloween ribbon, or use the thin wood Halloween cutouts…ghosts, witches, etc…
Or for ‘just fall’, make burlap flowers in gold or orange burlap fabric, or hang the thin wooden sign in the middle that says, “Happy Fall” or “Happy Thanksgiving”, etc…
Loved the burlap wreath! Looks so easy.
My daughter is getting married in a 13 days that wreath of byrlap will be quit handy for her outdoor wedding. Thank u!!
Kim 🙂
Awesome Kim! It would look really pretty if you used the burlap ribbon with the lace down the center! I would love to see pictures!
Did you get a pic with the lace? I have a lot of 2 1/2″ burlap ribbon and several yards of flat lace. I was thinking about joining the burlap with the lace to get a 5″ width but wasn’t sure if it would be too thick in the middle and whether or not the “flip” would allow the lace to always be on top?
Love your page and post. Tk you
Where do you purchase the burlap roll?
Andrea, you can purchase them at any craft store, Michael’s, Hobby Lobby and even Wal-mart. There is a link the post to some rolls on Amazon.
I found that WalMart’s burlap rolls are the least expensive… plus, they have the oversized single silk flowers for embellishment.
Some dollar stores carry the brown burlap too 🙂
Good to know!
Hobby Lobby has all of their Christmas ribbon on sale including plain burlap. I got 3 rolls of Halloween, Thanksgiving and Christmas burlap….can’t wait to try it. It looks complicated but I will give anything a try.
We are getting ready to down size from a t 2 story house w/finished basement to an apartment. I have been looking for decorating ideas and I love the wreath will be making that and will be a part of our new experience.
Love, love gotta make!
I also love the music! Artist? Tune?
Simply beautiful wreaths-and,they look so easy to do,as well! I think I’m gonna do up one for Christmas-along with suitable “knick knacks” to put onto it!
How many yards.does it take?
I used 10 yards for my wreath.
Thanks for the tutorial. I think I could make that now that I’ve seen your video. I can see it make into a wreath for every season.
How can one extend the size and make it the 2′-3′ wreath? More coathangers? I like mine BIG!
When I find a strong enough solution I’ll let you know!
I would just unwind the coat hanger and use the whole thing. Tuck the hook part back and use it hand up the wreath.
That’s it!
Fran Plarn, to make it bigger 2-3 ‘ I think I would bend the hanger straight. . do the burlap on it. set aside and straighten another hanger out. add the burlap to it. then combine the two hangers. hooking as she does on the one. bending it into a round shape.
I’m going to try this for the fall, Thanksgiving, and Christmas.
Make a bigger wreath: Instead of a coat hanger, in the garden shop they have
different sizes to hold up tall flowers from falling or tomato plants. those rings
would be perfect. They are light in weight and green in color. You would find them
at Lowes or Home Depot.
Hope mines turns out as pretty as yours or close to it 🙂
I think I could do this thanks much
love you ideas.
Just finished mine. Thanks!!
Did u pre-mark the burlap? It looks like black marks on it at maybe 4 or 5 inches for where to place the hanger as u alternated sides. Just curious…. Thanks for the project!!!
No I didn’t pre-mark it. I just kind of winged it. Depending on how far apart they are is how “fluffy” the wreath will be.
What is the length of the burlap roll?
10 yards/30 feet
How far apart are your markings.
I didn’t mark it I just winged it. They are about 3″ apart.
Too cute!!
It’s beautiful!!!!!. Great idea.!!!!!.Thank you for the tutorial.
What great timing. I was perusing for a craft to do with some friends this week that would be simple enough for the less talented crafters and by golly I think they are going to love this!
Do you put your holes in before or just put wire in burlap? How far apart?
No holes, just the wire in the burlap. The farther apart you make it the “fluffier” it will be..but you will use more burlap. I did it about 3″ apart.
very cute! can these be used on the front door if it not covered? or indoor only?
Thank you! I usually use indoors but I have one outdoors now that I take in during bad weather. Since I don’t have a covered porch.
Do cut part of the hanger off and just twist the ends?
I didn’t cut the hanger, this hanger in particular was already open in the cardboard bar along the bottom. The other wreath in the actual post from last year I just untwisted the “head”
Would love more simple ideas for Christmas gifts in my church.
1 thing you didn’t show was how you did the hanger did you open the end or did you cut it at the hook or was that hook uncoiled and part of it?
I’m getting ready to replace my garage 32″ passage door. May make wreath with some small tool embellishments to make the new door POP!
Cute idea!
Does using a hanger wire make it too flimsy for many embellishments?
I don’t think so, wire hangers are usually pretty sturdy.
I can see these with many other colored ribbons for different occasions! I thank you!
Did you cut your hanger smaller by any chance? I used a normal size hanger, one like you used and it was really big. I had to use 2 rolls of 15 ft burlap. :/
Amanda, I didn’t cut the hanger, I used a 10 yard roll of burlap, which translates into the same 30ft that you used.
I just made mine and thought it looked a but skimpy. Checked the package from the burlap ribbon and, darn it, it’s 15 ft. not 15 yards. Off to buy another roll of ribbon. I didn’t see rolls as big as 10 yards. Hmmm…
I know Walmart and Hobby Lobby has them. I purchased mine at Michael’s it’s in the floral section. Not the ribbon section. Good luck!
Love the burlap wreath! A project that never goes out of style. Thanks for sharing?
great project!
Did you just hot glue the embellishments?
Depends on what they are. You can hot glue them or I just used floral wire for my flower.
i love this it is the first of yours I have seen. Thank you, looking forward to more no brainer decorating for my challenged mind. Cindy
I’m definitely going to use this idea for teacher gifts this fall!!! Thank you!!! I even think my artsy 14 yr old daughter can make them for me:)
Like your do it yourself ideas.
First time I’ve seen your post–am anxious to try to make the wreath!
It took me three tries to get the rhythm of the weave, and I found that if I placed the wire too close to the edge of the burlap, it tended to pull out the threads, so I went in about an inch from the edge and put the weave about 3″apart. The burlap tends to swing around the hanger unless it is on the wall. Is there a way to secure it so the fluffy poufs stay on top? I thought about cutting a thin ring of cardboard and hot gluing it… I used teal burlap and a large reddish orange spider mum and it looks great in my kitchen!
I’m so excited to make this!! I’m doing a pumpkin one for fall and a red one for christmas!!! Fun project for this weekend just bought all the supplies!! Hobby lobby has burlap for 50% off this week 🙂 thank you for the video 🙂
I made my loops tighter the first time I made this – like the looser look better. I bought the burlap ribbon from HL and it did tend to fray A LOT, so going in about an inch is a great recommendation – wish I had read these comments first. I went to Michael’s and purchased a tighter weave burlap – just to see if that will be easier. Have you tried it with the mesh that is so popular now? Think that would work the same way – will have to try it myself. I really like how this wreath turned out – just don’t know where to hang 1 or 2 or 3 hee!hee!
Thanks Sue! My burlap frayed some but not much. It was Ashland’s from Michaels. I haven’t tried it with the mesh yet. Next week I will be writing a new post with reader’s pictures and answering many of the questions I have received. Send me a picture of your’s and I will share it!
I made a wreath today! It was so easy and turned out do cute. I absolutely love it!!! Thinking of doing one for each season!! Thank you so much for sharing this.
Love the idea, keep me posted of new projects. Thanks
It looked so simple when I first watched the video – but I can not figure out the loops – your hand hides that second turn/twist and I just can not see how it goes. Is there any way you can break that down somehow (prefer individual pictures or written instructions rather than the video). I would love to make this but am lost on second and third turn/twist thing.
I also went to the pictures from last year – still not getting it to look right. I can not figure out how you are getting the folds.
I’m struggling myself sitting here trying to make it. I’m not crafty and this is so simple. Lol..But i also can’t seem to do or see the loop. Going to keep trying…
I think a wreath of burlap would be lovely with open cotton balls attached around it!! Plus a center ribbon of course!! I’m from the south! Cotton would be plentiful here.
Very nice with great “how-to” video. When I make them I take pliers and straighten the wire end …when done I bend to close. Makes it easier to weave .
I am so glad I ran across this! I have so wanted to make a burlap wreath but never could figure out all the ties and everything else everyone was trying to show on the wire wreaths! This is AMAZING! Can’t wait to try it out over the weekend! Thanks for sharing!
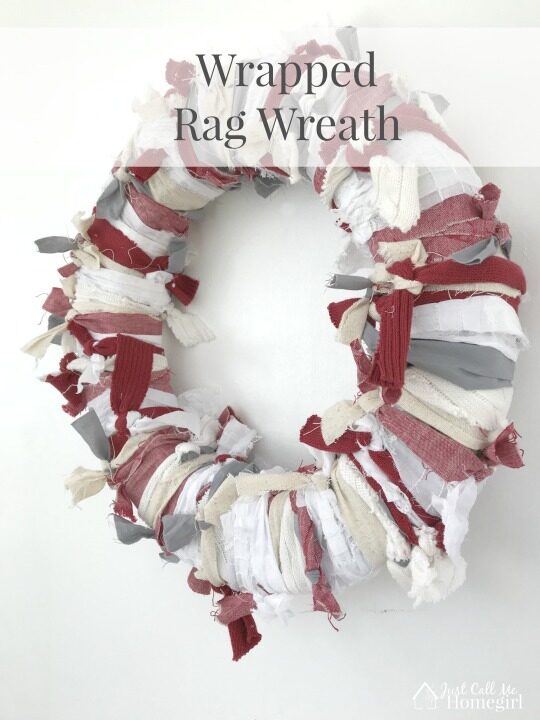
Neat idea and I am thinking of trying it with some odd materials I have laying around where not enough to make much out of but too much to toss so thought of making it into strips and then sewing them end to end and then do like the burlap and see what comes out. thanks for the idea to start with Sandy
Your idea for this burlap wreath is amazing. Love it. Can’t wait to try it. Want to make several. Thank you so much.
Great video and amazing idea with the burlap wreath. Can’t wait to try it. Could do this with a group of people and have a fun time. Everyone would have a different idea how to embellish it. How cool is that. Thanks so much.
I have some similar fabric and it’s red. I think for Xmas then put holly or bunches of colored jingle bells around it
Love your wresth!!
I watched the video a lot of time and was finally able to thread my burlap ribbon onto the coat hanger. i LIKE how it turned out. I bought an inexpensive fall bush and took it apart. I then glued the parts onto my wreath.
Thanks for sharing your creativity and directions.
I think that this is a wonderful idea, always wanted to know how to make a burlap wreath, now all I have to do is watch the video a few times and then try it!!!!! Sounds easy, but I sometimes take awhile to digest new things, unless I do them with some one telling me how to as I do the work!!!!! I think that one done in Christmas mesh would be beautiful and maybe white with Halloween things on it, if I could not find orange. Great idea, first thing I saw from you. Thank you for sharing. 😀 😀
I bought the plain green round wire to make wreaths with. It has four circles within it but can easily be taken apart to make four separate circles to make wreaths. Costs 2.99 but now half price at Hobby Lobby or 40%….such a deal. Have already made four and they look great. I found out the wider you insert the burlap in the wire circle, the better the wreath looks.
Thank you so much for posting this adorable idea! Is the burlap ribbon you’re using wired? I’ve just purchased my burlap ribbon and realized it’s not as wide (it’s 2.5″ instead of 5″ wide)and it’s also wired and I’m definitely not getting the same effect as your tutorial. Thinking I will definitely need wider ribbon but should it be non-wire also? Thank you!
Thanks! The ribbon is not wired and it’s about 5′ wide.
I know you meant 5″; not 5′ to Trisha. Looked for your email to tell you but my eyesight must be overlooking it. Great video! Very clear and easy and inexpensive project for next year after the fall sales start after Halloween. Thank you.
Great little video. Much easier than the wreaths with the artificial tree branches!!!!
Will any of the mesh type stuff for wreaths work for this??
Yes, but you might have to use a little more.
First time I have run into your website and must say very impressed. Thank you for sharing the instructions/video of your Burlap Wreath. Can’t wait to get to the store to buy the Burlap. Look forward to more of your intriguing craft projects.
Wow looks so easy I so existed to do this!!!!! I hope it’s as easy as it looks when you do it!!!
just saw your demonstration on facebook, very cute and clever. I really like easy crafts like that and just an fyi, if you cannot find colored burlap, just get the plain, a can of spray paint in your color of choice and go for it, then after it dries, weave it or even cut it into strips and continue on with your project.
I have made many wreaths with deco mesh on the round wreath wire. My daughter inlaw wants a brown burlap wreath and I had no idea how to make it so thank you for your tutorial. It’s very much appreciated.
This was a great project. I added some red burlap between the brown, gave it a nice contrast. Will make another one for sure.
Do you think it would be possible to use the regular deco mesh also, or not?
WoW thanks for sharing. Super video! Can’t tell its your first video. So clever, so simple
Have you ever made one with two colors? If so, how would you do that?
I haven’t yet but If I did I would lay one color on top of the other and use it as one. So you would get both colors showing through.
5″ x 30′ burlap rolls on sale this week at Michaels for $2.99.
Wonderful idea, I just made one with what I had on hand which was a wire heart shape about 6″ across widest point and 3″ wide burlap. Really pleased with the effect … thank you so much for sharing your great tutorial.
I tried colored burlap and it faded really bad within a short amount of time. My door is exposed to the elements but I’ve never had flowers fade. Has anyone had experience with the colored mesh? Does it fade or the color wash out?
This is so clever and seems so easy. What a beautiful idea! Thanks for sharing.
Hi! Absolutely LOVE this wreath! Where did you get that artificial flower? I’ve been trying to find one similar in color & size with no luck!
Thank you! I think I got it at Michael’s but I don’t remember!
do you mark places so far apart to poke the end of hanger through on the Burlap?
You are awesome! Thank you!
Love the wreath thanks for sharing. to mark your 5″ first measure then mark with a felt marker the 5″ mark. Then as you are sewing from top to bottom etc. it will be more uniform. If your marker wears off you can just measure and add it again.
I was looking for a simple and easy burlap wreath to make. This is so simple and easy, yet so beautiful. Thank you so much for sharing this video.
Hi
I found this post on pinterest and decided to use the macrame hoop instead of the hanger. I was having a hard time with the burlap bunching up and the top of the wire being exposed. I was wondering if you had and suggestions as to resolve that problem?
Thank you
I made this wreath today and it is so perfect! Thanks for the easy craft. 🙂
Hello. I just watched your video! I love the burlap wreath you created. Do you think I could use 10″ poly mesh?
Thanks.
I would think so!