
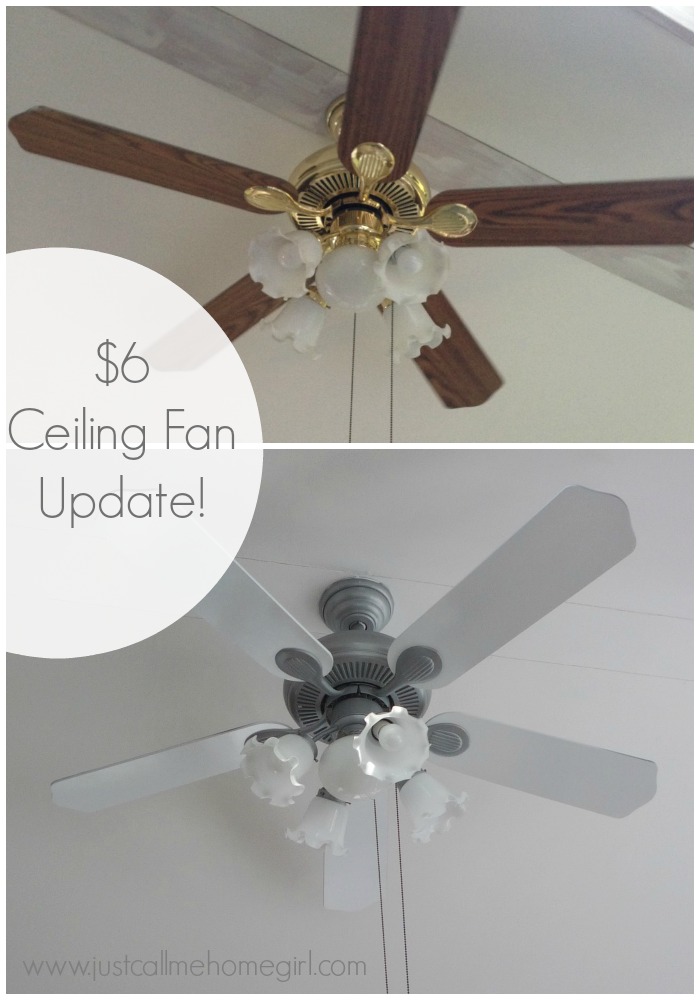
One of the reasons we bought this house was an amazing sunroom off of the kitchen/dining room. But it looked like it was out of an 90’s issue of DIY Home, especially the ceiling fan.
So as I was priming the walls and a beam in the ceiling I realized if I wanted to update the ceiling fan, I should to do it now before the second coat of primer and before the actual painting began in case it got messy.
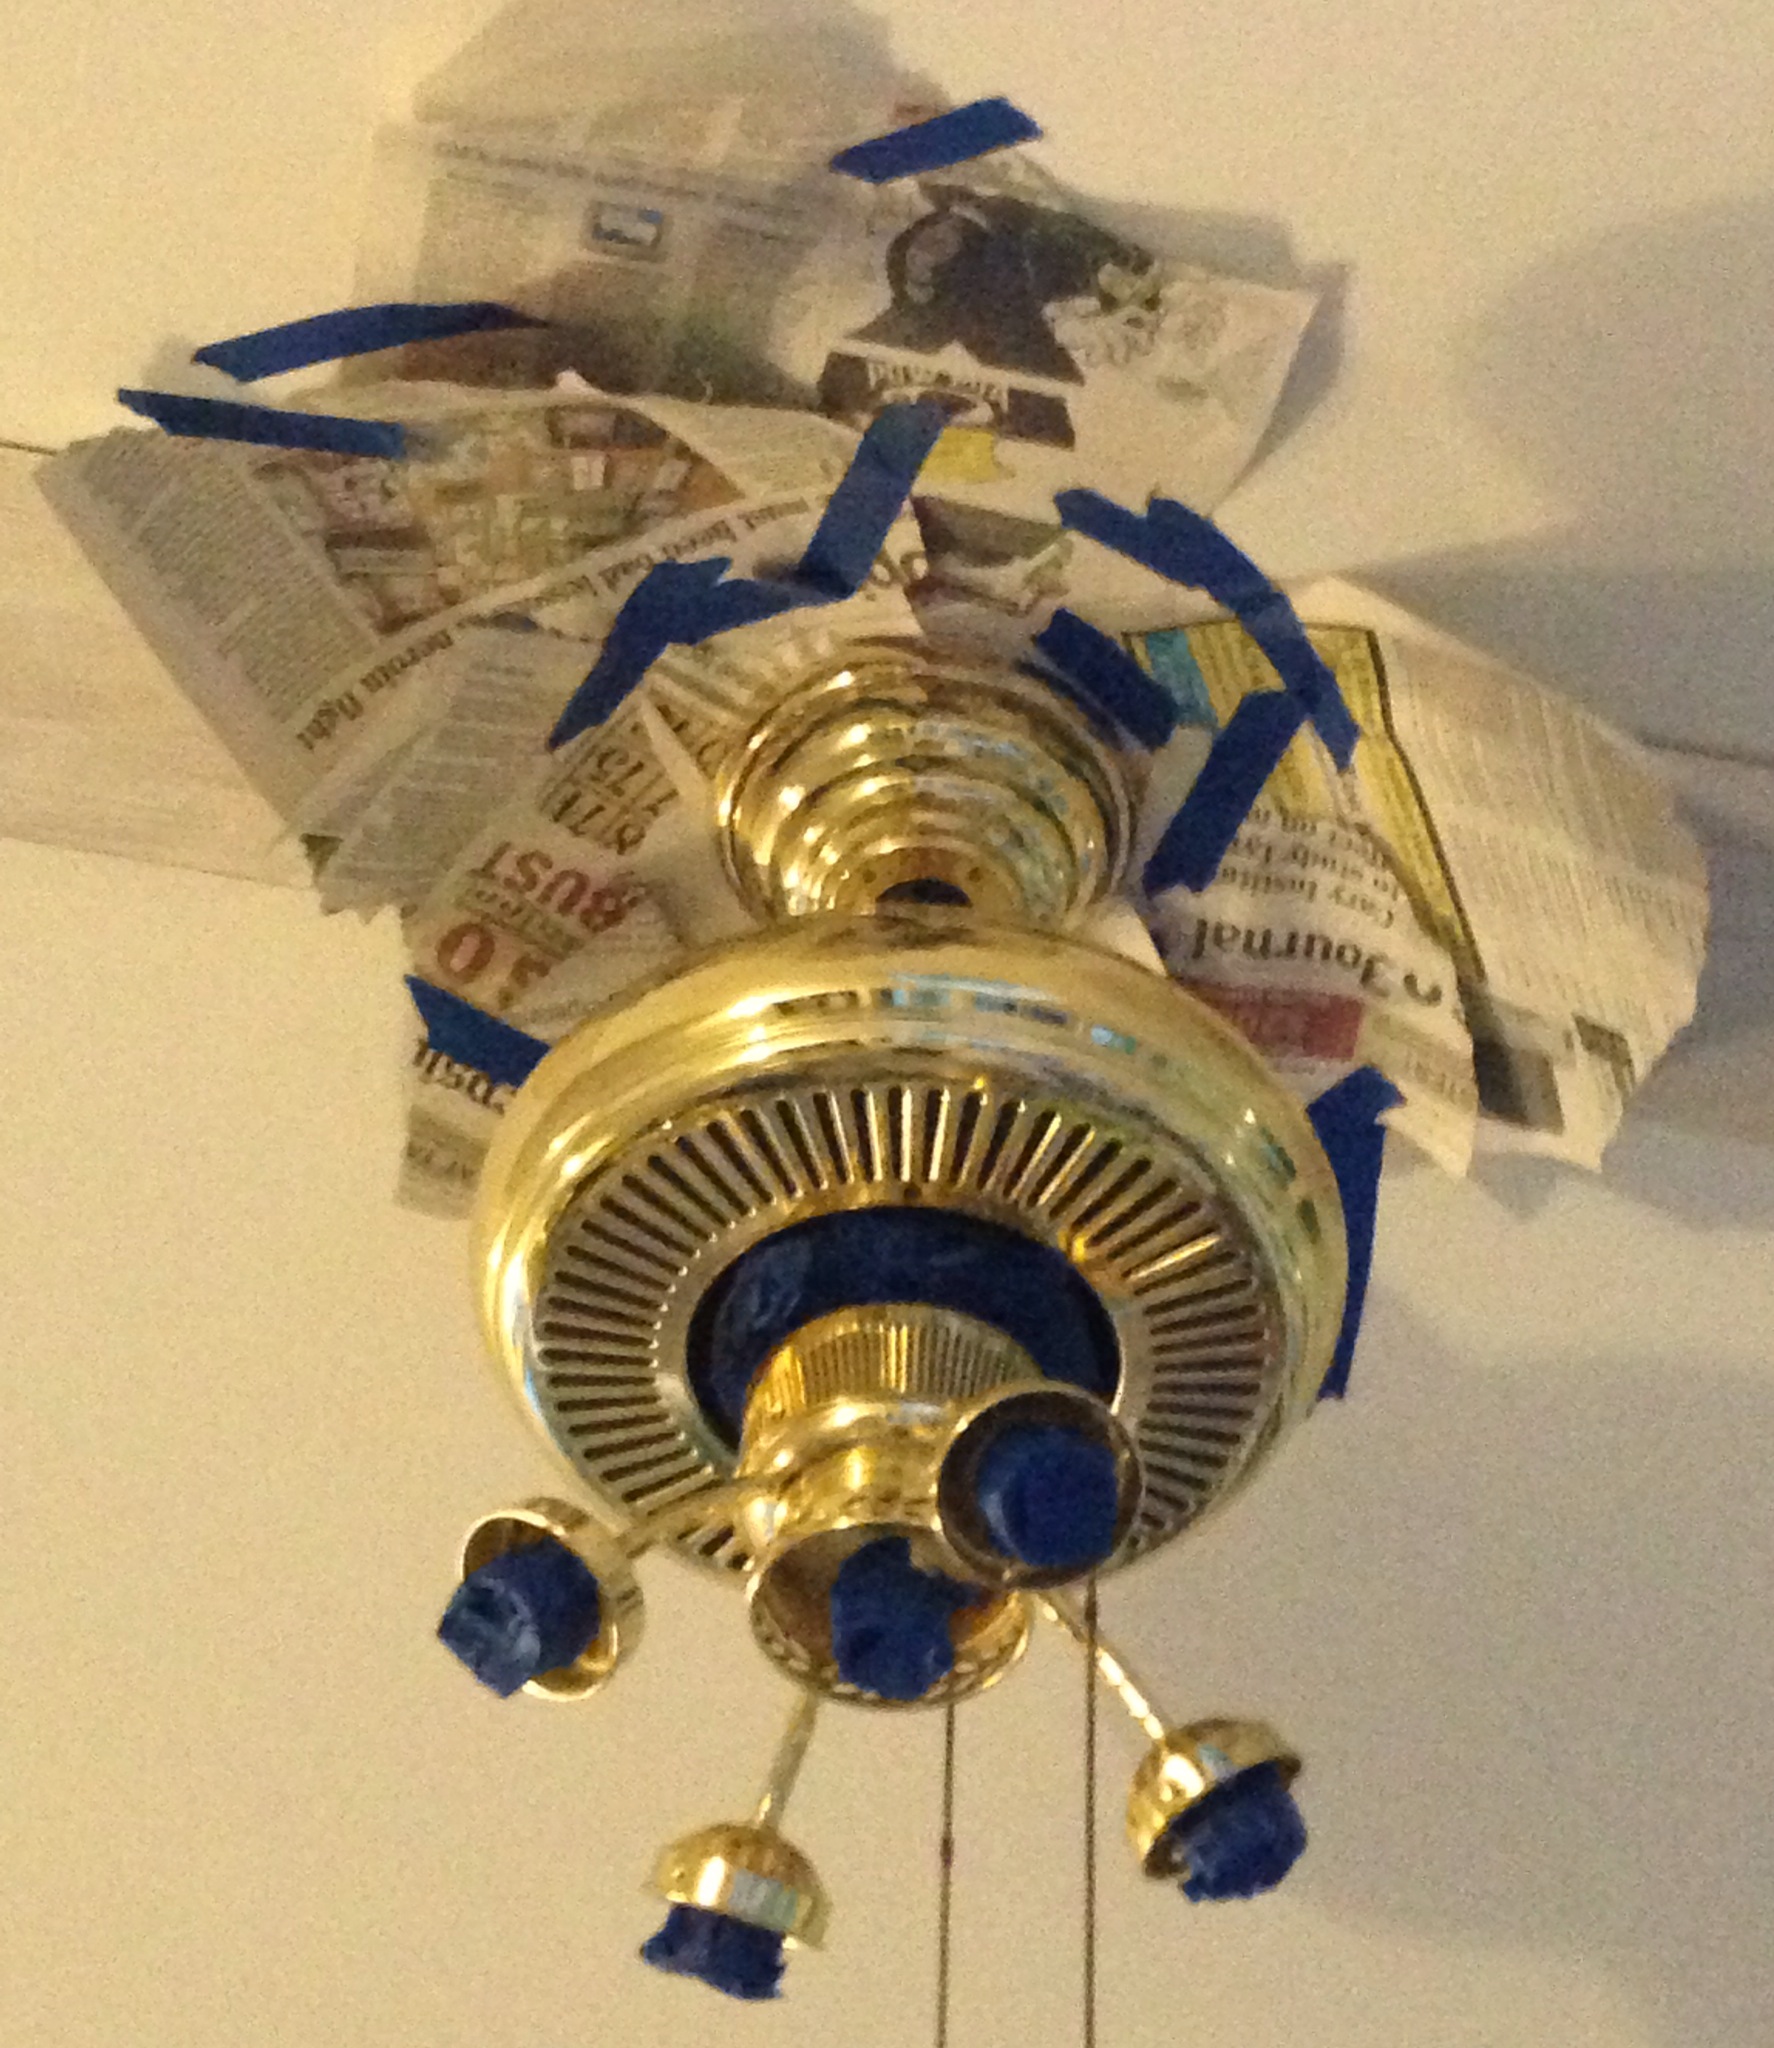
I am not an electrician so taking the ceiling fan off was not going to be an option for me. So I winged it and came up with a solution.
So here is my brass ceiling fan in all it’s brassiness glory:

I proceeded to take off the globes, which were in a huge need of a cleaning anyway, and started unscrewing parts I figured needed to come off. But, to my delight it was only the ceiling fan blades.
I taped up the electrical parts and I taped some newspaper to the ceiling. I didn’t make it perfect since I knew I will painting the ceiling anyway. I also taped some newspaper hanging down as well (which I didn’t get a picture of) just so my spray wouldn’t go all over the place.
I used Rust-o-leum’s Silver hammered look spray paint because I wanted to keep it light and not draw the eye up.
Spray paint in hand, I tackled the fan. I sprayed using short strokes, while trying just to get everything covered but not force the spray paint incase it went where it shouldn’t go.
I then spray painted the parts that attached to the blades and also the screws that hold in the light globes the same silver.
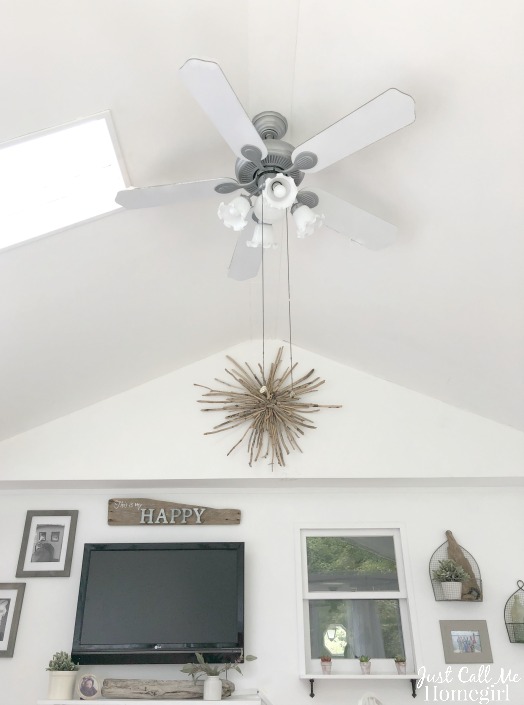
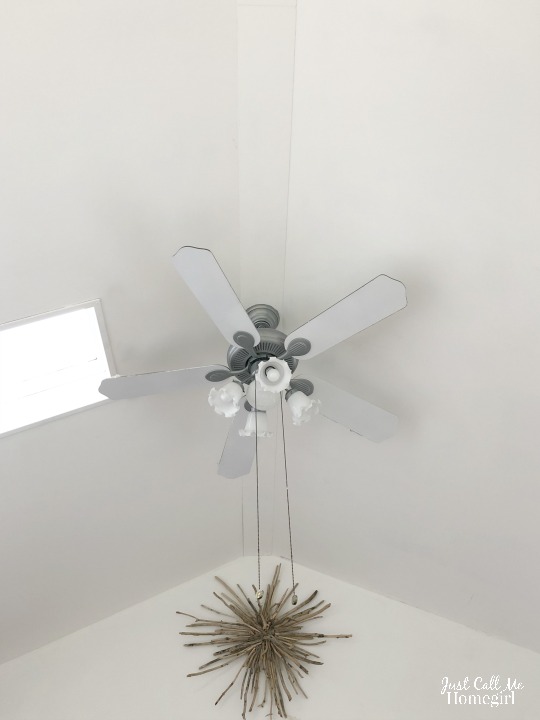
I chose to spray paint the actual blades white, because again I didn’t want to bring the eye up.
I put everything back together and voila! A beautiful new ceiling fan! It only cost me $6 for the spray paint and a little sweat since I decided to do this on a 90+ degree day!
What do you think?
*Update: A lot of question about whether it affected the motor at all, and it didn’t. We are still using this ceiling fan 6 years later.
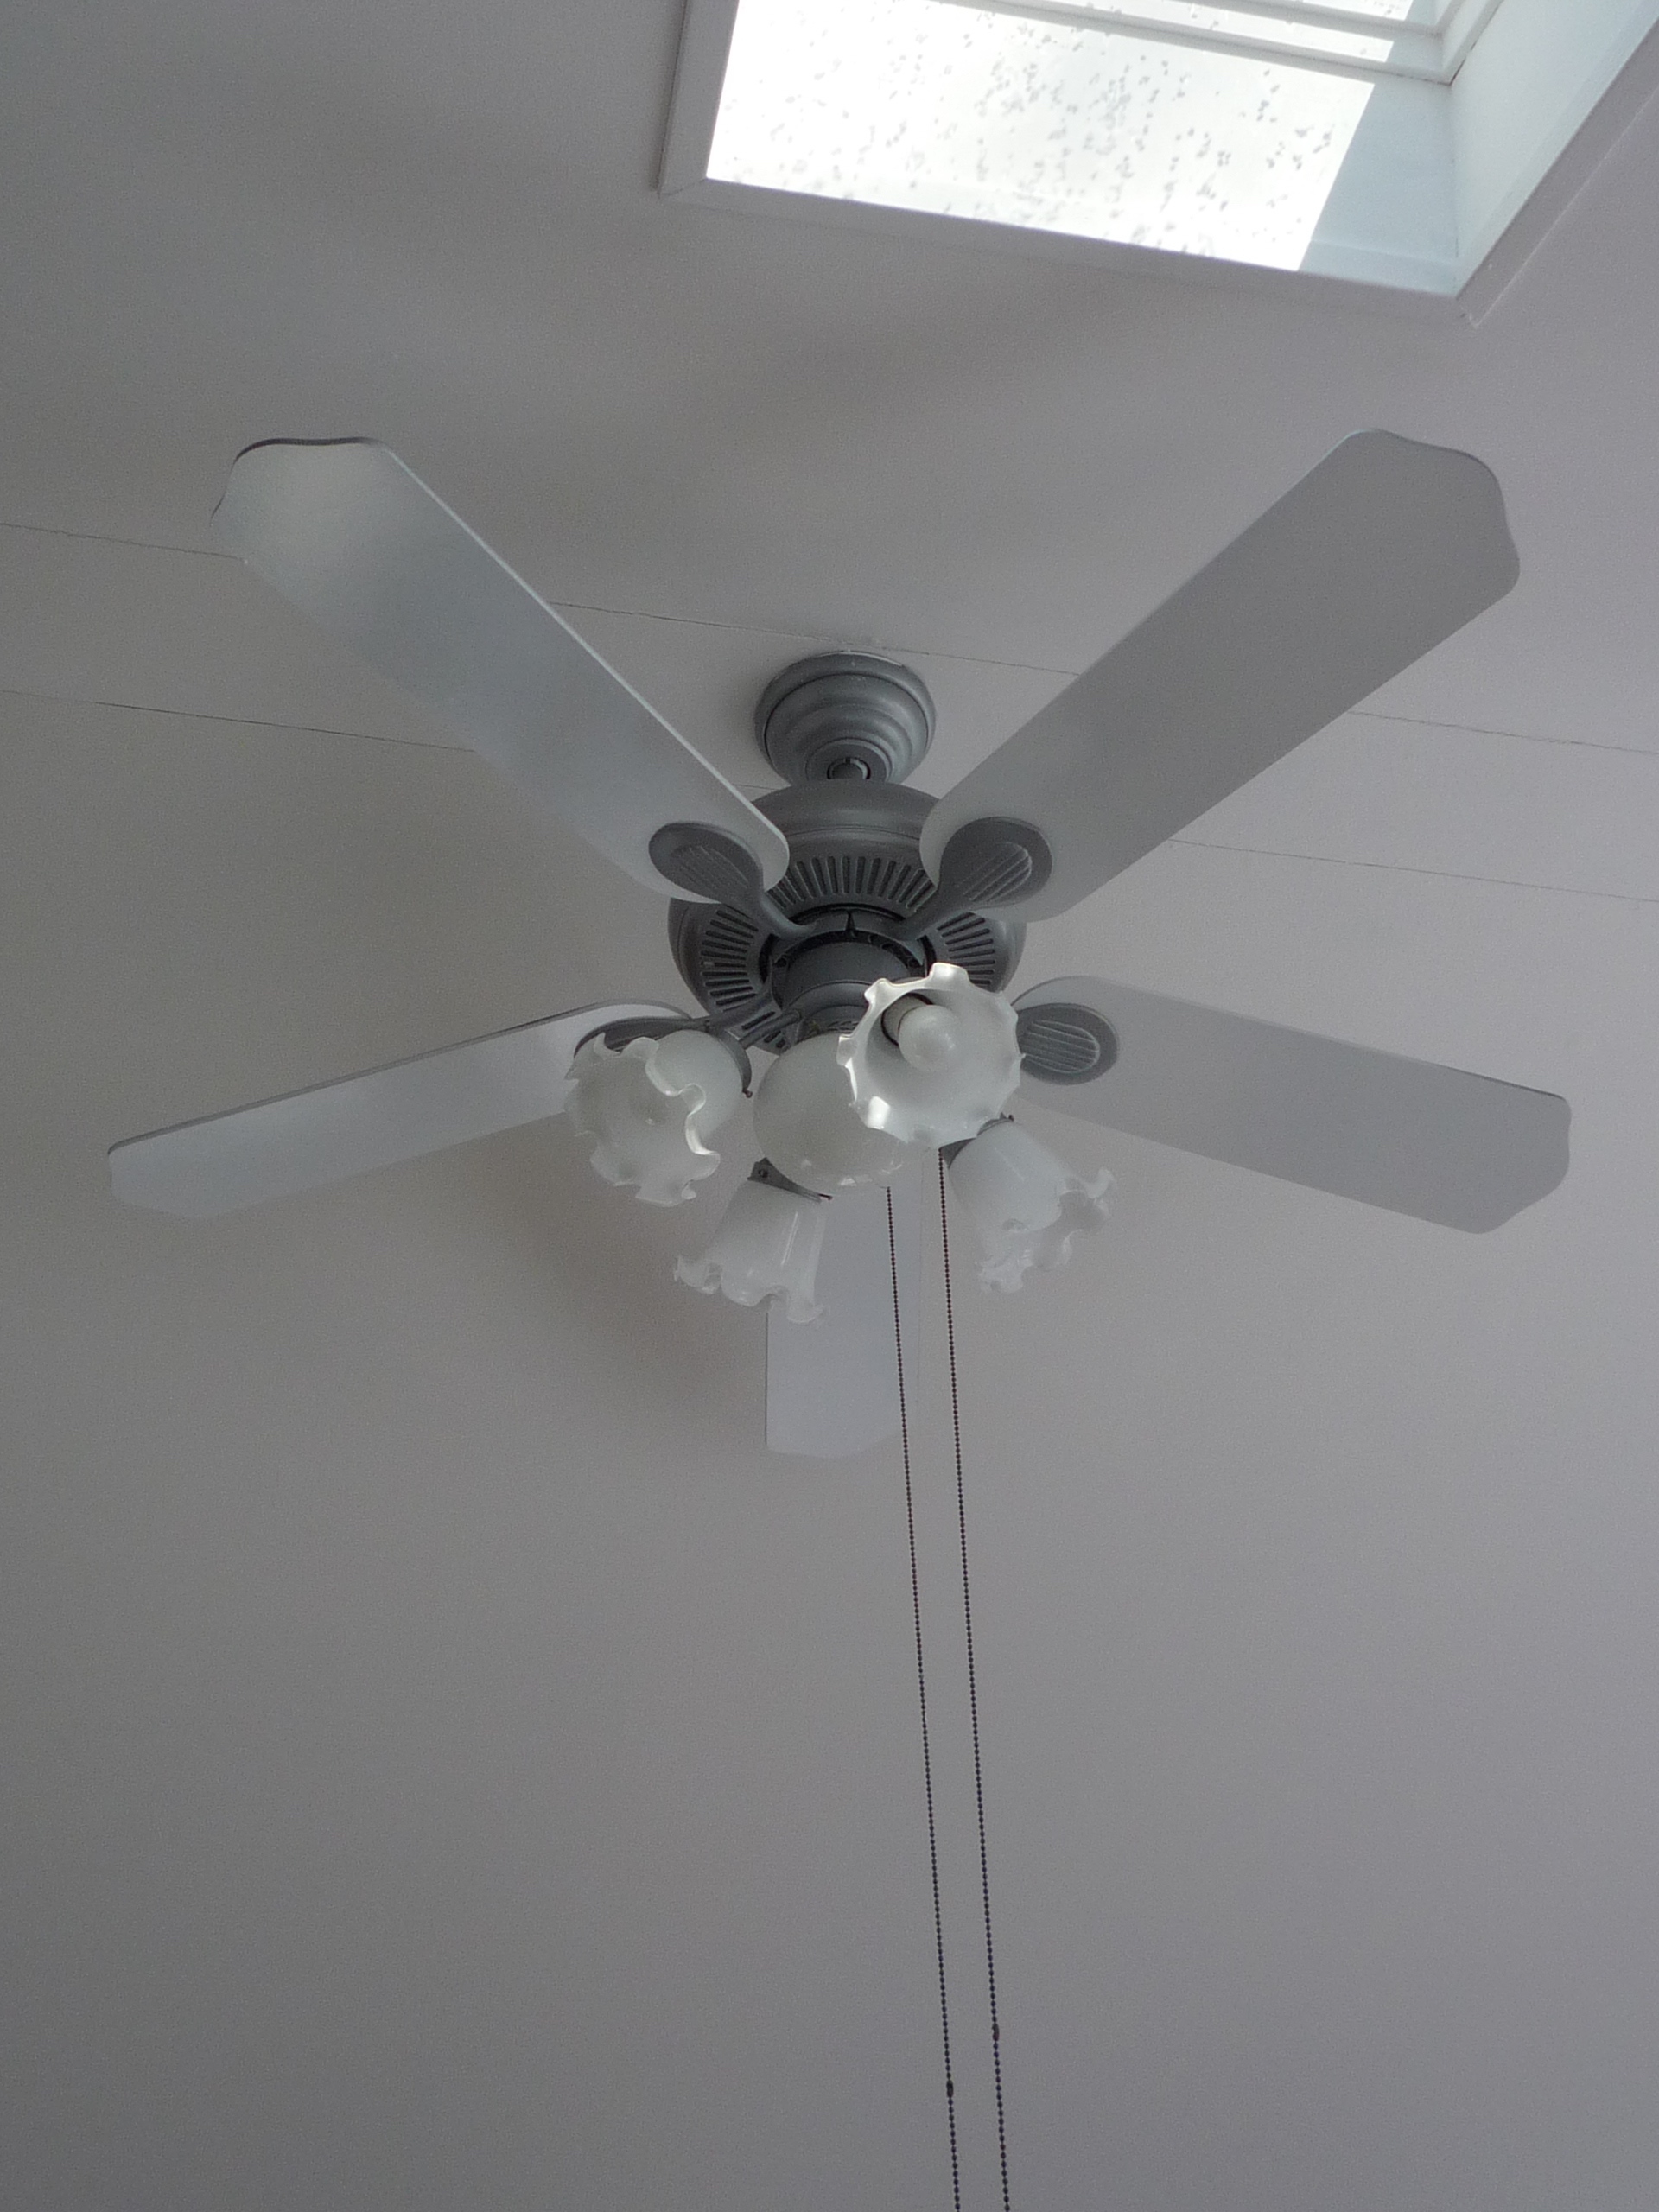
In the future I will probably change out the globes to something a little more modern, but these are fine for for now.
Take a look at our how the painting of our room turned out!

What a great idea! I love it. Thanks for posting this. I like inexpensive projects that are quick and easy. I have a few fans that can use an update and this is one that I will save to remember.
Love your idea but I have a question about the blades. Did you have to sand them or prepare the blades in any way before painting? Also, what type of spray paint did you use? And one other thing, I had read several years ago that painting the blades could make them not work properly–or something about the weight? Cannot recall exactly what the article said. Let me know how your fans are working since you have painted them.
Hi Karen, I did not prepare the blades in anyway just a wipe down with a damp cloth. I used Rustoleum’s Spray Paint in White, can’t remember if it was a specific type. And so far the blades work fine. I think if they did become off balance there are little weights you can purchase that clip to the blade, but not positive. Thanks for stopping by!
Doesn’t spraying a fan cause the blades to rotate off balance? I read that somewhere that it is not wise to paint a fan for that reason.
Some people have said that, I haven’t noticed it happening. I did spray with a light hand so not to get to heavy on the paint.
No problem. We used oil rubbed bronze spray paint on everything… blades and housing, and didn’t have any adverse effects when we turned them back on.
I would love to see a photo of the rubbed bronze end result! This is the look I am going for.
what about the opening in the fan. Will the paint get in the holes and damage the fan motor?
As of today the fan has worked perfectly. I just used quick strokes with the spray paint. I didn’t really spray “up in there”.
How did the spray paint over spray not get on the ceiling and trickle down in your face, etc.?
Hi Jean, I used Chalky Finish Paint. I did not spray paint.
It says several times in your post you used spray paint. I’m confused. Did you use more than one type of paint on the base? This is exactly what I’ve been looking to do and was just curious how you didn’t get paint inside the slots where the motor is.
I used only spray paint. I only sprayed a fine mist and I didn’t get close and “up in there” I kept moving the can and didn’t hold it still in one place.
I did this in my girls room this summer. Love the new look. I didn’t want to spray paint it though so I bought some hammered silver paint. It cost me more than spray paint, but I have 3 more fans to do. Plus I might just paint my gold light fixtures on the ceiling to match. I don’t like gold, but I love silver.
This came out nice but I would never do the painting that way. If you have to leave the motor part up there, I would use hand painting but it really is easy to take down and put back up. You can search for that here on Pinterest.
How to remove and replace a ceiling fan.
The colors came out nice considering the way you did this. It must have been a bit time consuming? I took down all the popcorn ceilings in my house and never want to have to be up on a ladder doing something like that again..lol!
Personally i would’ve bent the blades up a little bit so it wouldn’t look old, but carefully cause older blade arms can snap (i found that out the hard way)
I love it, my Mom just painted her bedroom in a light grey & had a horrible 90’s style ceiling fan that I told her to replace…..but we are going to do this, it’s perfect! SO glad I saw this, so thank you. What is the silver “hammered” paint? Is it just silver or What? Thanks, just wasn’t sure. ?
I love this idea!! I hate my dark brown ceiling fan against my white ceiling and gray walls. I love Rust-Oleums hammered look. I will be doing this. Thank you for sharing!!
That’s amazing! I am so thinking to try this because I am a DIY kind of lady! I am just skeptical on taking the fan apart etc…
Thank you for the push! I “traded” in my crappy 1990’s brass ceiling fan for a lovely espresso fan. I took mine apart a bit further then you did, but probably didnt need too. It looks great and was super easy. $4.00 rattle can and an hour of time. Worth it!
Most other sites suggest sanding the metal. Your paint stuck without sanding?
TIA