
Newsflash. Some projects just don’t go the way you want them to. I am no exception.
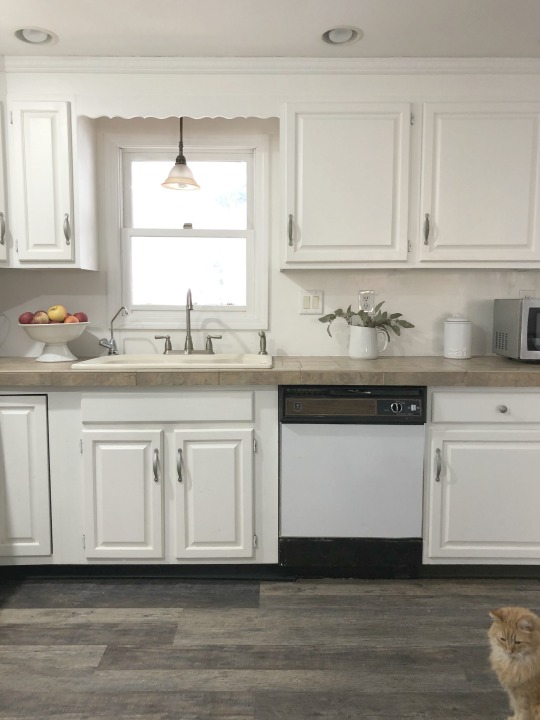
If you follow me on Instagram, you would have seen my plan to remove the backsplash in my kitchen. It’s the same tile as our countertops as well as the old tile that was on the floor, and I hate it.
The tile is a brownish, mauvy color that is not my taste. The old homeowner tiled the backsplash as well as the countertop with the same tile and for the last 6 years I have looked forward to removing it all.
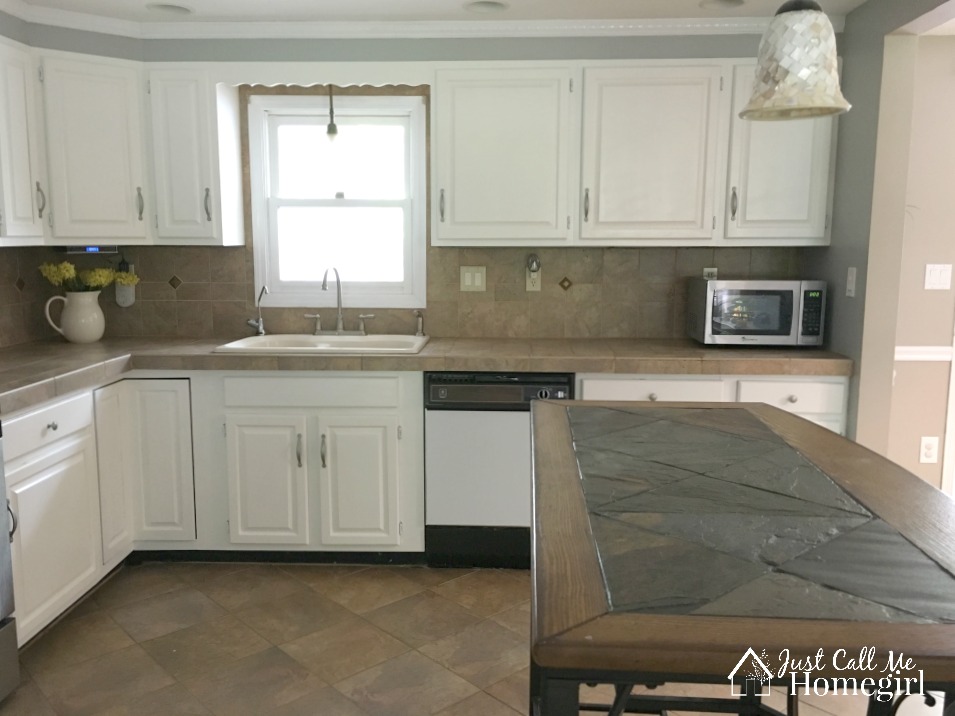
While it’s not in the budget yet to get new countertops, I had the brilliant idea of just removing the backsplash and painting the wall white. This would not only brighten the kitchen, but when it is time for new countertops, I would be able to (hopefully) pop them off (he tiled over the old countertop) and just place the new ones.
So I am hoping this effort will save me in the long run!
I enlisted the help of my Mom and Dad since they were visiting for the week. I like to try new projects or bigger projects while they are here because they have taught me all I know about, so if there is something I haven’t done before or that I know they do better than me (spackling) I wait until they come to do it incase something goes awry.
Before they came, I wanted to see what I was dealing with, so I removed one small tile on my back splash to see how it came off, what was behind it etc. It wasn’t too bad, he had tiled onto drywall but it seemed to come off pretty easy and was easily patchable.
Well, when I went to drop my daughter off at school, my Mom took another tile off and it was a fail. It took most of the sheetrock off with it. Continuing on…most of them took the sheetrock off with them.
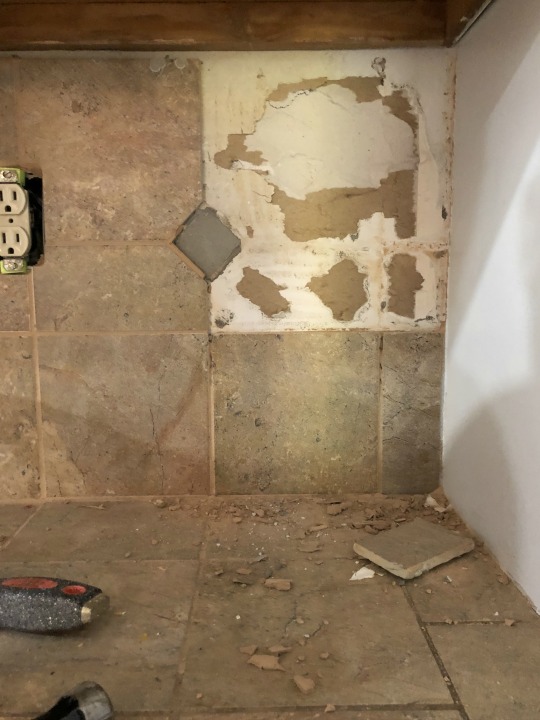
When he tiled, he tried to use cement to adhere the tile to the drywall, which of course won’t work so he decided to use some unknown substance. Which was a major overkill and took everything with it.
The first day we decided Mom could just patch it the one side, which we started doing..but the second day was worse. We could not get the tiles off. And mostly all the drywall came with it. It was a mess.
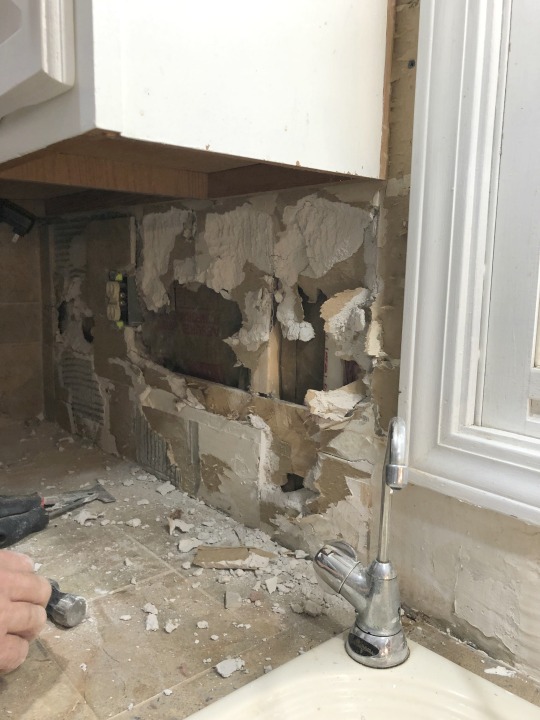
We decided it was best to get rid of the drywall and install new. Which was what I was trying to avoid.
But in the long run I know it was a better and easier decision.
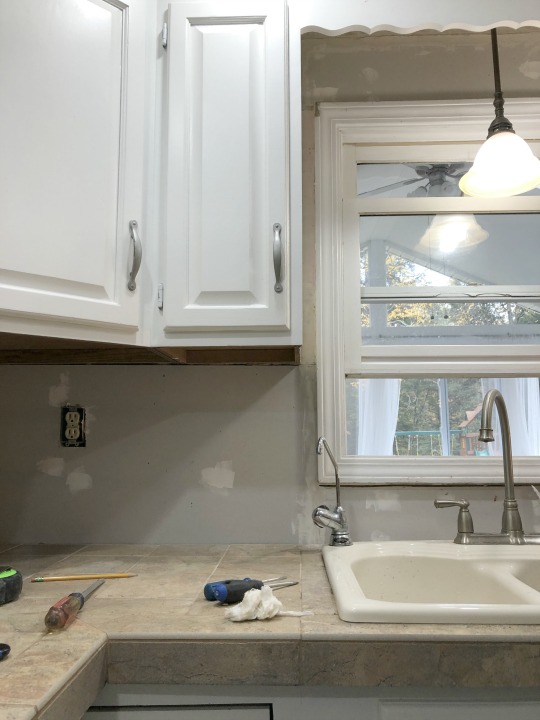
We only got one wall done during their stay, but decided since they would be back for Christmas, I would start the next wall before they came down…but actually removing the drywall because who knows what I will find and then if I hit any snags I know they will be here to show me the ropes.
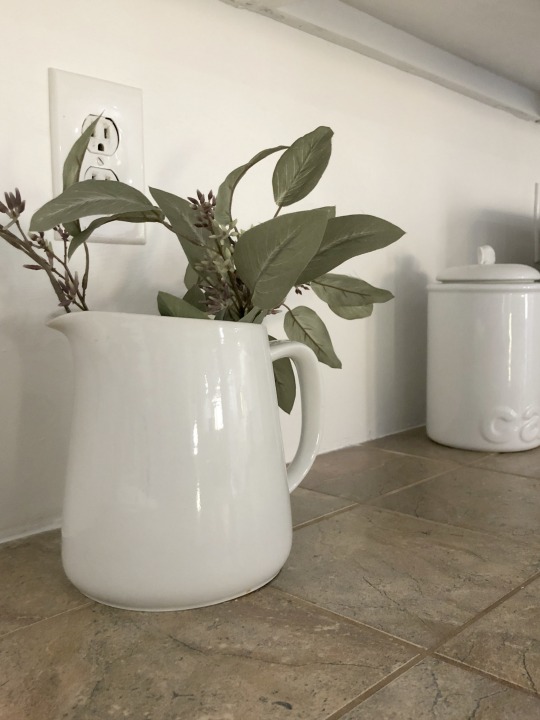
I painted the wall the same color as my cabinets and what a difference!
I am waiting for new countertops..when it’s in the budget and then decide what I want to do but right now I am enjoying the less brownish color in my kitchen. At least on one side.
I’m sharing this to encourage you that if you don’t like something, change it! Even if it it doesn’t go as planned you can work through it…maybe with a plan B..or C or D. But everything is fixable.
Don’t be intimidated by a little DIY!

I love what you have done so far. It’s just my though But I think if you took the scallop down over the sink your cabinets would look more updated. I enjoy your post, keep up the good work. Diane
Thank you Diane! It’s actually on the to do list! Has been for about 2 years now Ha! It will probably happen when I take down the next wall of tile.
Tiling over drywall with thin set is how back splashes should be installed. Taking that off always results in drywall damage. No exceptions. I’m not sure if anyone told you that. Just cut the drywall off and call it a day. I work in tile design and home design so we face this often. Counter tops are the same. Just take it off a d go from there.