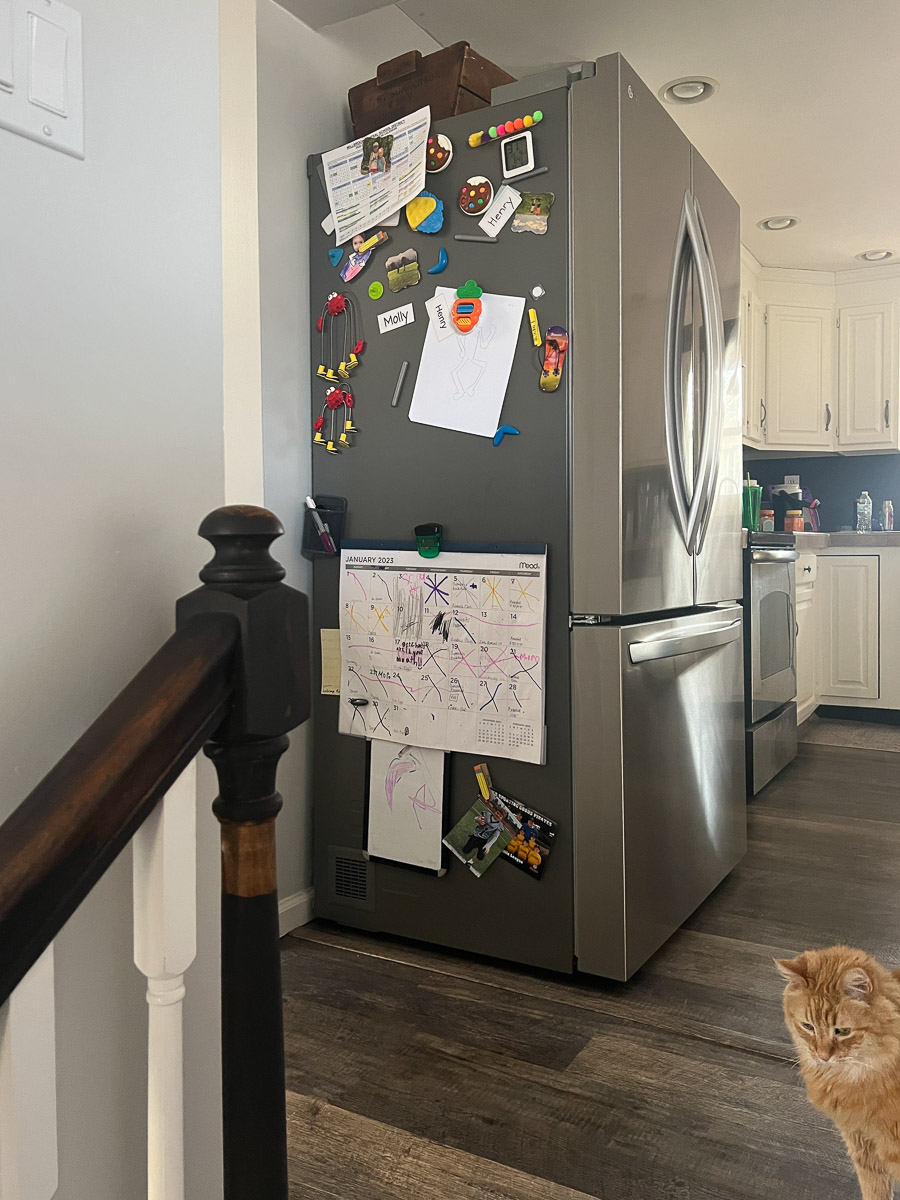
One thing that always bothered me since we moved into our home was when we walked up the stairs, our view was the side of the refrigerator as well as when you walked down the hall the fridge right there.

It looked unfinished and like it was an afterthought. My guess is when the old owners purchased a new fridge it did not fit in the same so the removed the wall. It’s also halfway under the overhang where the wall was.
I wanted to create a wall that was shallow enough to let the fridge breathe but also look like it belonged there.
My first idea was a basic wall with 2x4s sheetrock etc. I even built it but the thought of taping and spackling so it was smooth and perfect paralyzed me and the wall sat there for a few weeks waiting to finish it off.
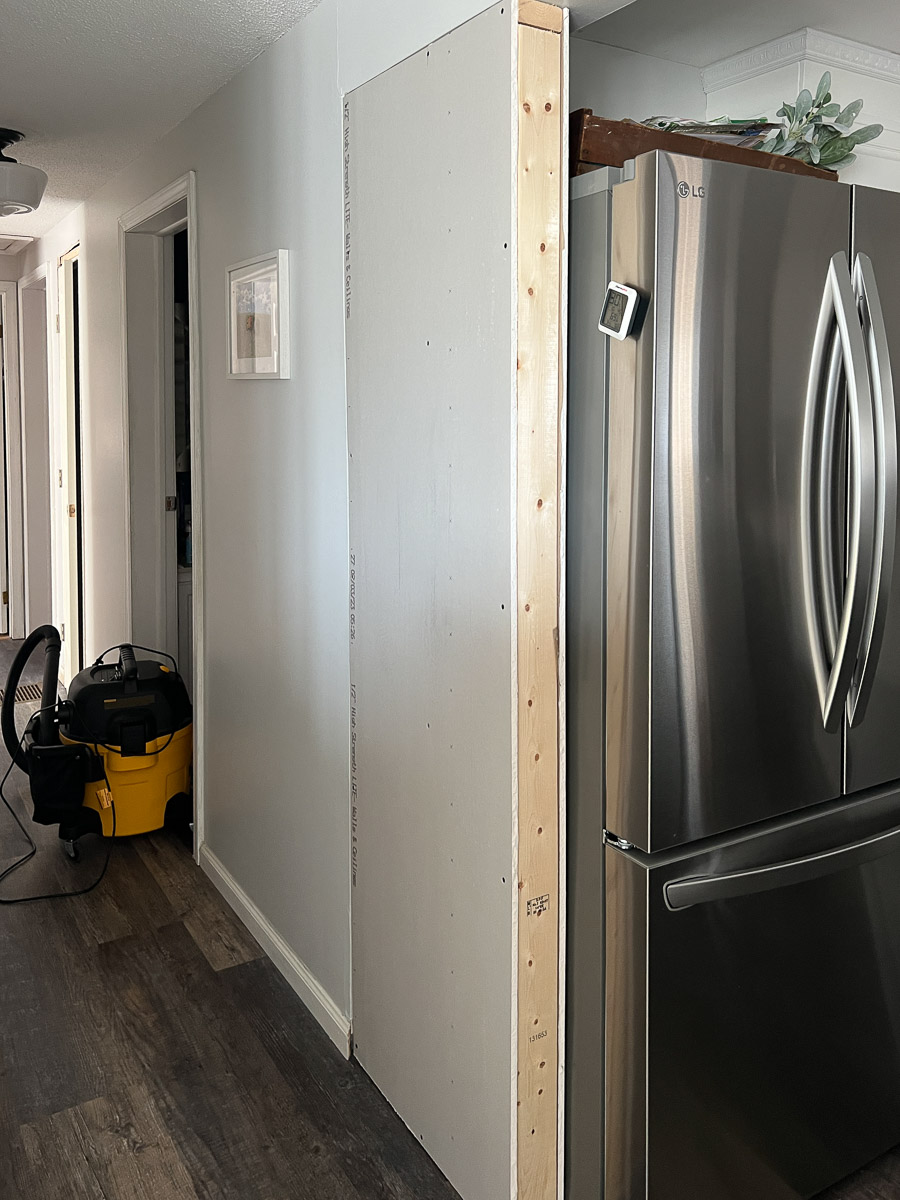
During those few week I saw Sam of DIY Huntress create a beautiful shelf wall by her fridge and it sparked inspiration. Hers was made to look like a standalone piece but I wanted mine to look like it was a continuation of the hallway wall.
How to Build a Shelf Wall
Supplies:
Some of the following links are Affiliate links. Click here to see my full disclosure.
As always these tools are not required to build, this is what I used. Feel free to use an appropriate tool you already have on hand.

Step 1.
Build a frame to the specific dimensions you need for your space. I used the 1x4s for the side, top and bottom securing them with wood glue and a nail gun.

Step 2.
Router the back of the frame using a rabbeting bit for the backing to sit flush.

Step 3.
Cut the luan panel down to the size needed for the backing. You can use a table saw for this but I used my jig saw instead of maneuvering the large piece on the table saw myself.

Step 4.
Using wood glue secure the panel into the frame and let dry. I also put a few small brad nails into the back using my nail gun.

Put into place. I secured it to the top and along the sides into the studs.

Step 5.
Cut down your 1×4 shelves to the size and quantity needed for your piece. Cut a 1/4″ off the shelves to make room for the backing and to let them sit flush with the front.
I used pocket holes on the undersides of the shelves to secure them but you can also use your nail gun coming from the outside of the frame.

Step 6.
Cut 1×2 for trim pieces to add interested and a rail. Secure with nail gun or pocket holes.
Step 7.
Prime, caulk and paint.
Like I said I wanted mine to look like an extension of the hallway wall so I painted it the same color as the wall. (Dove by Behr)

I love the interest and beauty that this piece has brought to the hallway!

For those wondering how I hung the picture frame without nails I used these picture hanging command strips you can purchase here.